Billing Register
Reports
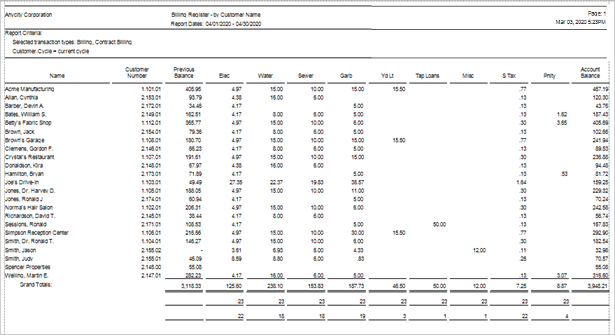
Use the Billing Register to print a written record containing regular entries of items or details for billed amounts. You can use the Billing Register to verify billed amounts on customer accounts. The report options allow you to filter the report by transaction type and service, or set up the report to include only final billings, manual billings, service amounts. There are additional options that allow you to summarize totals by service category and process each period separately.
Billing Register
Printing Billing Register
1. Open Connect Utility Management > Reports > Billing Register.
2. Use the Definition box to select a report title and then press Enter.
3. Select the report date range.
How do I change the report date range?
How do I change the date type?
How do I change the date type?
How do I prompt a user to enter a date?
4. Select the report options.
Print only customers with service amounts
Include quantity columns for non-metered services
Process each period separately
5. Set up the selection criteria, report order, report sections, and columns.
How do I set up the Selection Criteria?
How do I set up the Report Order?
How do I set up the Report Sections?
6. Click Print (CTRL+P) or Preview (CTRL+Q).
The billing register prints.
202005, 2020Mar03
Options
Transaction types
Select the billing transaction types to include on the report. To include a transaction type, click to select the checkbox next to the transaction type description. To exclude a transaction type, remove the checkmark.
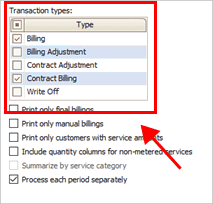
Transaction types
Print only final billings
A final billing is the name given to transactions that record the last, or final, billing. Use Print Final Billings Only to print a billing register that is limited to customer accounts that have been terminated by recording a final billed amount.
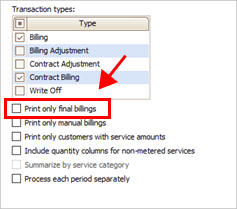
Print only final billings checkbox
What do you want to do?
I want to print a billing register for customers with final bills. On the Report Options tab, click to select Print Final Billings Only.
I do not want to print a billing register for customers with final bills. On the Report Options tab, click to deselect Print Final Billings Only.
Print only manual billings
Use Print Manual Billings Only to print a billing register that includes customers that have manual billings. A manual billing is a billing that was created as a single, or one-off, bill. For example, Jane uses a manual billing to enter tax, interest, and penalty amounts.

Print only manual billings checkbox
What do you want to do?
I want to print a billing register for customers with manual billings. On the Report Options tab, click to select Print Manual Billings Only.
I do not want to print a billing register for customers with manual billings. On the Report Options tab, click to deselect Print Manual Billings Only.
Print only customers with service amounts
Set up the report to only include customers that have service amounts.
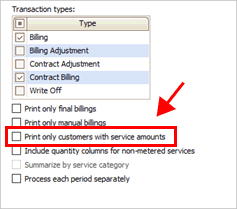
Print only customers with service amounts checkbox
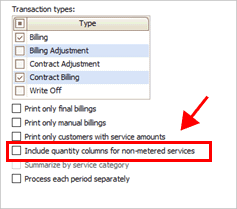
Include quantity columns for non-metered services
Set up the report to add a column that shows quantity. Use the quantity column to review the number of items at the service address. For example, if 123 Anystreet has two garbage cans so the Quantity column on the report will show the number 2 next to the non-metered service for garbage.
Include quantity columns for non-metered services
Do you want to include quantity for non-metered services?
Yes, print the quantity of items for non-metered services. On the Report Options tab, click to select Include Quantity Columns for Non-metered Services.
No, do not print the quantity of items for non-metered services. On the Report Options tab, click to deselect Include Quantity Columns for Non-metered Services.
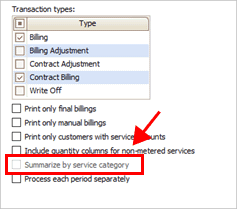
Summarize by service category
Group services by service category on the report.
Summarize by service category
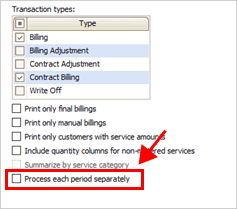
Process each period separately
Set up the report to print a separate section on the report for each period. Using this option will disable the drill-down capability.
Process each period separately checkbox
Services
Use the Service list on the Additional Options tab to select the services to include in the selection criteria. The Services list will include metered and non-metered services.

Services on the Additional Options tab
What do you want to do?
I want to search all services. On the Additional Options tab, click to select the checkbox in the Service header row. Connect will select the checkbox for every service.
I want to select the services to include. On the Additional Options tab, click to select the checkbox next to a service to include it.