Certification Notices
Tax Certification
Print tax certification notices at any time during the month to send to a tax certification customer to inform them of the certified amount. Some organizations print certification notices right after they create tax certifications and update customer balances.
Contents
Before you get started
Set up and save a form layout for certification notices (Organization > Forms). See the section titled Setting Up a Form Layout for Certification Notices.
Printing certification notices
1. Open Connect Utility Management > Tax Certification > Certification Notices.
2. Select a report title.
3. Enter the Report Dates.
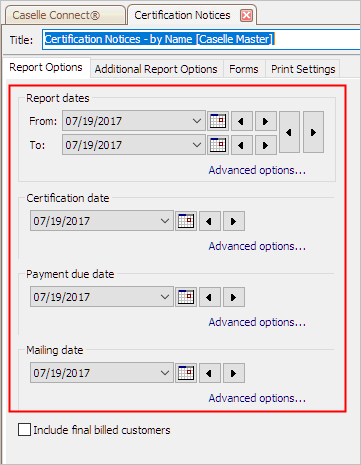
Enter the Report Date range.
Select the Certification Date.
Select the Payment Due Date.
Select the Mailing Date.
4. Do not select the checkbox titled Include Final Billed Customers.
5. Set up the Additional Options.
For additional information, see the following sections:
Selecting the Number of Copies to Print
6. Select the Form Layout.
For additional information, see the following sections:
Setting Up a Form Layout for Certification Notices
Assigning a Form Layout to Print Certification Notices
7. Click Print (CTRL+P).
The report prints certification notices for the selected customers.
Selecting the mailing address
You can print the cosigner or landlord mailing address on the customer copy. Usually, the customer copy will use the customer's mailing address. However, in some instances, you may want to send the certification notice directly to the cosigner or landlord.
Do this...
1. Open Connect Utility Management > Tax Certification > Certification Notices.
2. Set up the report options as usual.
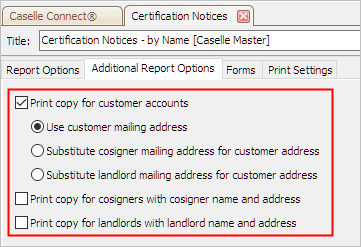
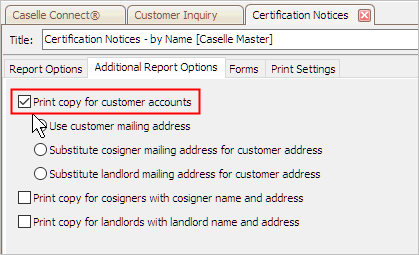
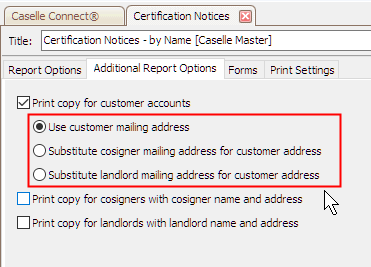
3. Click to select the Additional Report Options tab.
4. Select the checkbox titled Print Copy for Customer Accounts.
This checkox is usually selected.
5. Select the address to print on the customer copy.
You can replace the customer's mailing address on the customer copy with the cosigner or landlord address. If you need to print another certification notification for a cosigner or landlord, use the checkboxes below the highlighted section. See the section titled Selecting the Number of Copies.
4. Click Print (CTRL+P).
The report prints a certification notice for each of the selected groups.
Selecting the number of copies
You can print up to three copies of the certification notice. One copy for the customer, one copy for the cosigner, and the last copy for the landlord. You need to select at least one option to print certification notices.
Do this...
1. Open Connect Utility Management > Tax Certification > Certification Notices.
2. Set up the report options as usual.
3. Click to select the Additional Report Options tab.
These checkboxes control the number of copies to print. Usually, the customer copy is selected by default. To replace the mailing address on the customer copy, see the section titled Selecting the Mailing Address.
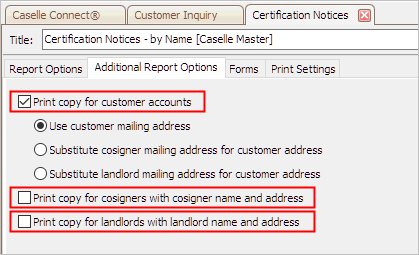
Who will receive a certification notice?
Customer. Click to select the checkbox titled Print Copy for Customer Accounts and click to select the option titled Use Customer Mailing Address.
Cosigner. Click to select the checkbox titled Copy for Cosigners with Cosigner Name and Address.
Landlord. Click to select the checkbox titled Print Copy for Landlords with Landlord Name and Address.
4. Click Print (CTRL+P).
The report prints a certification notice for each of the selected groups.
Printing certification notices for final billed customers
Send a certification notice to a customer with a terminated account. Usually, an account is not closed until the account balance is paid. However, if an account is closed and certified amounts exist, you can use this option to create a certification notice for the terminated account.
Do this...
1. Open Connect Utility Management > Tax Certification > Certification Notices.
2. Set up the certification notices as usual.
3. Click to select the checkbox titled Include Final Billed Customers.
4. Click Print (CTRL+P).
The certification notice prints for terminated AND active customers with certified amounts.
Setting up a form layout for certification notices
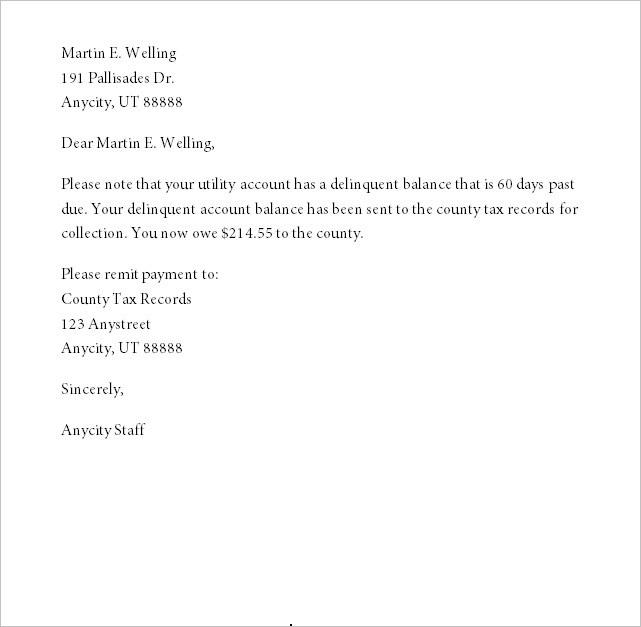
Watch a video to see how to set up a form layout for certification notices. Here's an example of a certification notice...
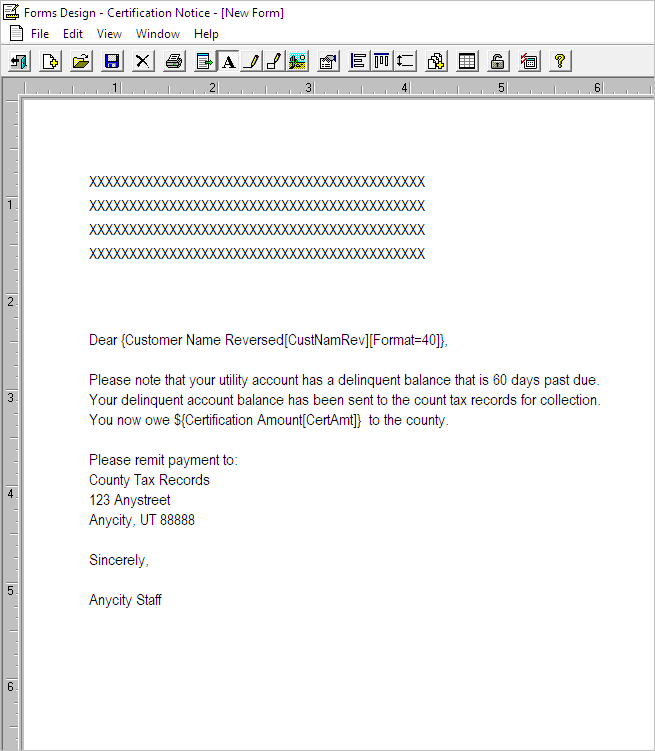
...and this an example of how that certification notice would look like designed as a form layout (Organization > Forms). If you need assistance setting up a form layout for certification notices, contact Caselle support at (800) 243-8275.
Assigning a form layout to print certification notices
You can select which form layout the report will use to print certification notices.
Do this...
1. Open Connect Utility Management > Tax Certification > Certification Notices.
2. Set up the certification notices as usual.
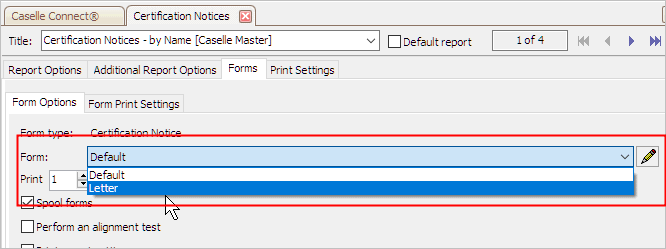
3. Click to select the Forms tab.
4. Use the Form menu to select a form layout.
If the Form menu is empty, you'll need to set up a form layout before you continue. See the section titled Setting Up a Form Layout for Certification Notices.
5. Click Print (CTRL+P).
The report uses the form layout to print certification notices.
Updated on 19Jul2017
Copyright © 2025 Caselle, Incorporated. All rights reserved.