Enter Meter Readings
Record the meter readings on a service account.
A meter reading collects usage, diagnostics, and statistics from a utility meter for billing and maintenance.
Contents
- Enter Meter Readings
- Entering meter readings
- Deleting meter readings
- Setting up meter reading options
- Playing a beep when additional registers exist
- Ordering the meter reading entry list by customer number or reading sequence
- Choosing batch mode or single mode
- Creating billing transactions
- Showing meter entry list for the future period
- Changing the meter reading date
- Display meters by service
- Changing the billing date
- Modifying cost adjustment factors
Entering meter readings
1. Open Connect Utility Management > Meters > Enter Meter Readings.
2. Fill in the Meter Readings Options.
Use the sections in this help topic to fill in each field. The fields are listed in alphabetical order. Click Options (F12) to edit this form.
3. Enter the reader comments, current read, and usage.
4. Proof the customer numbers and readings
Click Proof Totals (CTRL+Shift+F1) to (1) total the customer numbers and readings on each page and (2) display the customer hash number and read totals.
5. Make changes, if needed
If changes are needed, click on a row in the transaction grid to select it. Now, you can edit the meter reading information.
7. Enter meter reads for the next customer group
Click Options (F12) if you need to enter meter reads for the next customer group. If not, click Close (CTRL+F12).
8. Repeat steps 3 through 7 to enter the next meter reading.
You're done.
Deleting meter readings
If you need to edit a meter reading, you'll need to delete it and then enter the updated information as a new meter reading.
Do this...
1. Open Connect Utility Management > Meters > Enter Meter Readings.
2. Fill in the Meter Readings Options.
Use the same settings as the settings for entering the original meter reading.
3. Click Delete (CTRL+D).
The meter reading is deleted.
Setting up meter reading options
When you launch the Enter Meter Readings routine, the Meter Reading Options form displays.

Playing a beep when additional registers exist
When a meter has more than one register, play a beep.
Do this...
1. Open Connect Utility Management > Meters > Enter Meter Readings.
If the Enter Meter Readings routine is already open, click Options (F12).
2. When the Meter Reading Options form displays, click to select the checkbox titled Beep When Additional Registers Exist.
3. Click OK.
The routine will sound a warning beep when more than one register exists on an account.
Ordering the meter reading entry list by customer number or reading sequence
Sort the meter reading list by customer number or reading sequence. Usually, this option is set up to match the meter reading list.
Do this...
1. Open Connect Utility Management > Meters > Enter Meter Readings.
If the Enter Meter Readings routine is already open, click Options (F12).
2. When the Meter Reading Options form displays, find the section titled Order By.

3. Click OK.
The meter reading entry list displays in the order selected.
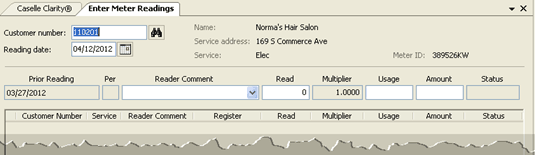
Choosing batch mode or single mode
Use batch mode to enter meter readings for a group of customers that are submitted together for printing. Or use single mode to enter meter readings for a single customer.
Batch mode, looks like this...
The grid shows the meters in the selected batch. After you enter the meter readings for the current customer, the routine will display the information for the next customer in the grid.

Single mode, looks like this...
In single mode, you enter the customer number followed by the meter readings. To enter the meter readings for the next customer, you need to change the customer number.
Do this...
1. Open Connect Utility Management > Meters > Enter Meter Readings.
If the Enter Meter Readings routine is already open, click Options (F12).
2. When the Meter Reading Options form displays, find the section titled Entry Mode.
3. Select the entry mode.
4. Click OK.
The routine uses the selected entry mode to set up the entry form.
Creating billing transactions
You can enter meter reads and create billing transactions when you enter a meter read, or you can enter the meter read and then create the billing transaction later. A billing transaction records the total amount billed in the customer's file.
Do this...
1. Open Connect Utility Management > Meters > Enter Meter Readings.
If the Enter Meter Readings routine is already open, click Options (F12).
2. When the Meter Reading Options form displays, select the checkbox titled Create Billing Transactions.
3. Click OK.
The routine records the meter read and creates a billing transaction. .
Showing meter entry list for the future period
Display the meter reading list for the current period or for a future period. Use current period to record transactions in the present period. Use future period to record transactions in the period that occurs after the current period.
Do this...
1. Open Connect Utility Management > Meters > Enter Meter Readings.
If the Enter Meter Readings routine is already open, click Options (F12).
2. When the Meter Reading Options form displays, use the Period menu to select Future.
3. Click OK.
The routine shows the meter reading entry list for the future period.
Changing the meter reading date
The reading date is the date the system will use to record the entry.
Do this...
1. Open Connect Utility Management > Meters > Enter Meter Readings.
If the Enter Meter Readings routine is already open, click Options (F12).
2. When the Meter Reading Options form displays, use the Reading Date field to enter a new reading date.
3. Click OK.
The routine uses the new reading date to record meter reads.
Display meters by service
Filter services displayed in the meter reading list.
Do this...
1. Open Connect Utility Management > Meters > Enter Meter Readings.
If the Enter Meter Readings routine is already open, click Options (F12).
2. When the Meter Reading Options form displays, find the section titled Services.

3. Click to select the service that you want to display in the meter entry list.
4. Click OK.
The routine displays the meter entry list for the selected service.
Changing the billing date
The billing date is the date the system will use to record the entry.
Do this...
1. Open Connect Utility Management > Meters > Enter Meter Readings.
If the Enter Meter Readings routine is already open, click Options (F12).
2. When the Meter Reading Options form displays, use the Billing Date field to enter a new date.
3. Click OK.
The routine uses the new date to bill meter reads.
Modifying cost adjustment factors
A cost adjustment factor allows an organization to recover the costs associated with administrative, planning and development, and implementation fees for providing a utility. The cost adjustment factor is a tool an organization can use to match costs with revenue. Contact support at (800) 243-8275 for assistance.
Do this...
1. Open Connect Utility Management > Meters > Enter Meter Readings.
If the Enter Meter Readings routine is already open, click Options (F12).
2. When the Meter Reading Options form displays, click to select the Cost Adjustment Factors tab.
If the table is empty, there are no cost adjustment factors to apply.
3. Click OK.
The routine uses the cost adjustment factors saved in the table to adjust entries.
Updated on 20Jun2017.
Copyright © 2020 Caselle, Incorporated. All rights reserved.