
Create a new record for a customer.
Use Setup New Customers to set up a new customer, location, billing services, deposits, and meters.
In this Topic Hide
To copy from an existing customer, log into CIMS and look up KB2715: Connect Utility Management Setup New Customer (23m30s). Setting up a new customer starts at the 5-minute marker.
To set up a new location, log into CIMS and look up KB2715: Connect Utility Management Setup New Customer (23m30s). Setting up a new customer starts at the 13 minutes 42 seconds marker.
All of the steps in this help topic take place in Connect Utility Management > Customers > Setup New Customers.
Usually, this field displays the next available customer number. However, you can also type in a new customer number.

Customer Number field
The customer name is the name of the individual that is responsible for the account.
What is the customer name?
I want to enter the customer name. Use the Name field to enter the customer's first and last name.

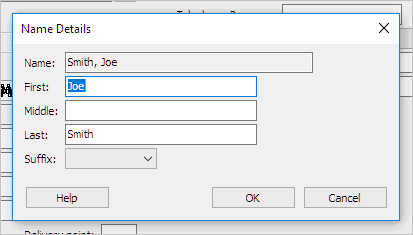
I want to format the customer name. Click the button, located at the end of the Name field. Use the Name Details form to enter the customer's first, middle, and last name.

The Name Details form displays. You can use this form to manually assign the first name, middle name, last name, etc.
Set up the customer's location and service address. You may also need to update the customer's telephone numbers.
What do you want to do?
I want to use an existing location and service address. Select the checkbox titled Copy From a Previous Customer and then use the Previous Customer Number field to enter the customer number of the last customer to occupy the location and service address. Selecting this checkbox will copy all of the information linked to the location and service address to the new customer record.

I want to enter a new location and service address. Use this section of the Setup New Customer form to enter the new location and service address.

Assign the customer to a customer type. A customer type is a label that defines the behavior for a customer group.

What is the customer type?
I know the customer type. Use the Customer Type drop-down list to select an item.
Do not apply a customer type. Use the Customer Type drop-down list to select None.
I need to add a new customer type. Use Organization > Customer Type to add a new customer type. You may need to exit and relaunch Modify Existing Customers to update the items in the Customer Type list.
Add a cosigner, if needed, to the customer's account. A cosigner is shares joint responsibility for an account. The Cosigner field is located on the Modify Existing Customers > Customer tab > Customer 2 subtab.
What do you want to do?
Add a cosigner. Find the Cosigner field on the Modify Existing Customers > Customer tab > Customer 2 subtab. Then, use the Cosigner drop-down list to select a name.
Show me more information about a cosigner. Select a name from the Cosigner drop-down list. Then, use the Cosigner menu to select Search.
Change the cosigner properties. Use the Cosigner menu to select Modify.
Search for a cosigner. Use the Cosigner menu to select Add New.
The master record store's each account's name, address, telephone, and email address, and it can also store a list of applications with related records. A related record is another record that is stored in one of Connect's applications that also references the same individual or business as the master record. A Master Contacts List will cut down on the number of duplicate entries, for example, entries that may use a different spelling of a customer's name or contains out of date contact information, by providing a quick way to scan all of the records that are tied to the same customer at the same time.
The Master Contacts List shows you:
A Master Contact Name
A list of related records
The location of the related record in the Connect database
Do you want to assign the customer to a master contact?
Yes, I want to assign the customer to a master contact. Use the Master Contact field to enter the master contact name or click the dynamic button, at the end of the field, to add a new master contact or search for an existing master contact. Click here for more information about master contacts.
No, I do not want to assign the customer to a master contact. Leave the Master Contact field blank.
Updated 11Dec2017
A landlord is the owner of property that is leased or rented to another. This section includes several scenarios to illustrate what to do to disconnect the existing tenant, bill the existing tenant, and connect a new tenant.
When a tenant moves out, the tenant is final billed. If there's a new tenant, you'll be prompted to set up a new customer record for the new tenant. But if there's not a new tenant, you'll be asked to reconnect service at service address to the landlord. For more information, click here.
Setting up a new customer as a landlord
Setting up an existing customer as a new landlord
Updated 11Dec2017
This section shows the location number and service address.

Location tab in Setup New Customers
Updated 11Dec2017
If you're adding a new location and service address, the routine will add the default services for a new service address. If you're copying a location and service address to a new customer, the services that were set up on the location and service address will be copied here.
You can use the checkboxes in this section to add or remove service. To add a service, select the checkbox. To remove a service, clear the checkbox.
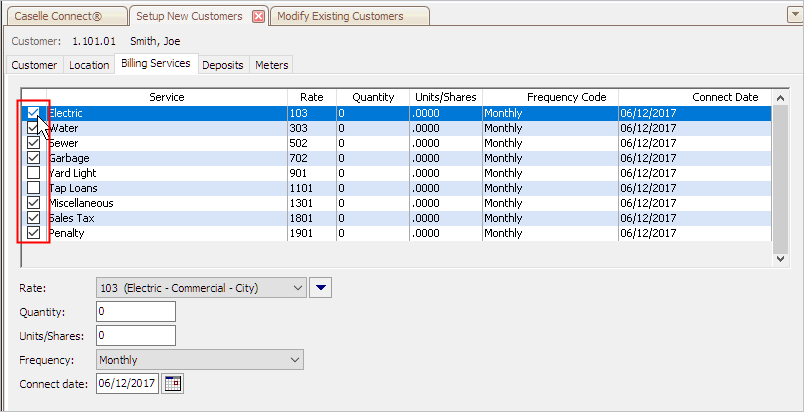
Billing Services tab in Setup New Customers
You can also adjust the billing rate, quantity, unit/shares, frequency, and connect date.

Billing Service Details
Use this section to add a service deposit. If a service deposit isn't needed, you can leave this section blank.
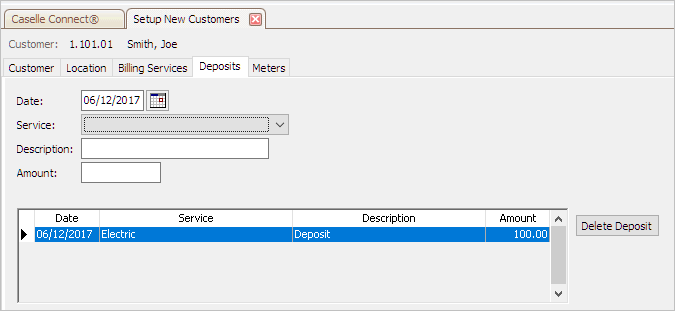
Deposits tab in Setup New Customers
If you're copying the location and service address, this section includes the last meter read recorded at the service address. The new customer will use the last meter read recorded as the beginning meter read.

Meters tab in Setup New Customers
If the customer would like to send utility bills, notifications, and so on to a different address, for example a PO box, you can use the Address Line 1, Address Line 2, City, State, and Zip fields on the Customer tab in Setup New Customers or Modify Existing Customers to add a new mailing address. This is the customer's permanent mailing address.
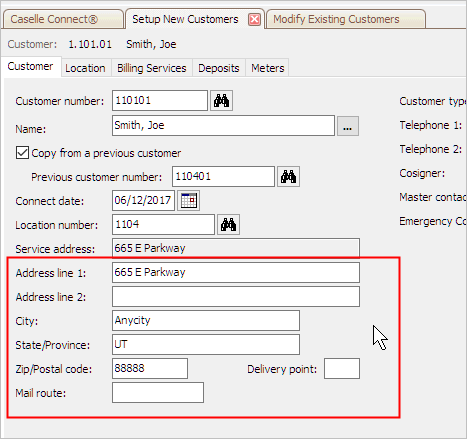
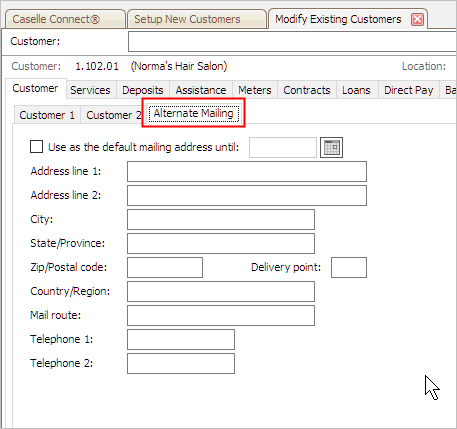
If the customer uses a different mailing address for part of the year, use the section titled Alternate Mailing Address in Modify Existing Customers a secondary mailing address without deleting the customer's permanent mailing address.
You'll need to add the new location to the Location table (Locations > Setup New Locations).
Updated 11Dec2017