How do I add a master contact to a customer?
Setup/Modify Customers
Link the customer to a master contact. A master contact stores the customer's information in the System Management application. When you link a customer to a master contact, you can print reports and view information from accounts in other Connect applications that belong to the same customer. See also the help topic titled How do I add a master contact? in System Management.
For example, Joe Smith lives in City XYZ where he owns a home and a business. Because he owns a home, Joe has a utility account for his home, another utility account for his business, and a business license. Jane at City XYZ has created separate accounts for Joe in Utility Management and Business License. Jane also takes a moment to create a master contact record for Joe in System Management. Now, Jane can click the Related Records button to view Joe's transactions in Utility Management and Business License.
Contents
What's new
2018.11 or later. See what's new in the 2018.11 release. Rewrite of features and options.
Adding a master contact to a customer
1. Connect Utility Management > Customers > Modify Existing Customers.
2. Look up a customer.
3. Click to select the Customer tab > Customer 1 tab.
4. Use the Master Contact drop-down list to select a cosigner.
You can type in a master contact name.

Master Contact
Or you can use the Master Contact  menu to Search.

Master Contact menu
5. Click Save (CTRL+S).
The cosigner is saved.
Updated 07Aug2018
Adding a new master contact to a customer
Connect Utility Management > Customers > Modify Existing Customers.
2. Look up a customer.
3. Click to select the Customer tab > Customer 1 tab.
4. Click the Master Contact menu.
5. Select Add New.
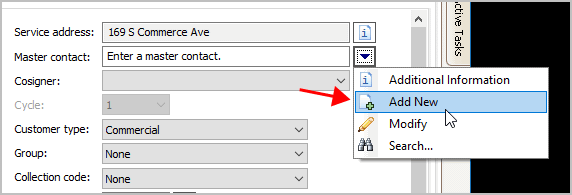
Master Contact menu
The Setup/Modify Contacts form displays on the screen.
6. Fill in the master contact information and then click Save.
Click this link for more information about master contacts.
7. After you save the master contact record, return to Modify Existing Customers.
The master contact that you just set up will be displayed in the Master Contact field on the Modify Existing Customers form.
8. Click Save (CTRL+S).
The master contact is assigned to the customer and saved.
Updated 07Aug2018
Copyright © 2025 Caselle, Incorporated. All rights reserved.