How do I assign customer numbers sequentially?
100, 101, 102, 103...
Use Assign Customer Numbers Sequentially to assign consecutive numbers to the entire set of customer numbers, or assign consecutive numbers to the selected segment within the a set of customer numbers.
Contents
Before you get started
-
Back up the database. See the help topic titled How do I back up the database?
Assigning customer numbers sequentially
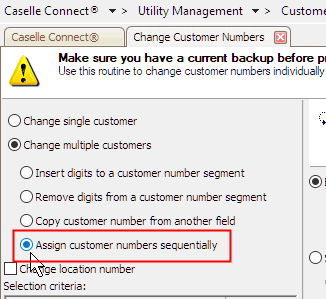
1. Open Connect Utility Management > Customers > Change Customer Numbers.
2. Click to select Change Multiple Customers.
3. Click to select Assign Customer Numbers Sequentially.
4. Click Entire Customer Number.
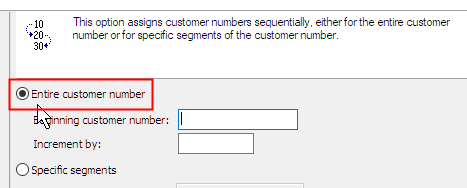
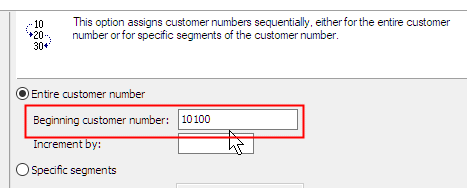
5. Enter the Beginning Customer Number.
The Beginning Customer Number is the first number to assign to the customer numbers that will be reassigned.
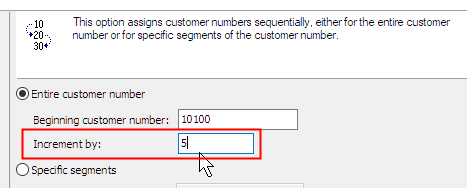
6. Enter the Increment By.
Increment By is the value to increase a value or number. For example, Jane wants to increase vendor numbers in increments of 10. She uses 10 as the New Beginning Vendor Number and enters 10 in the Increment By field. When the routine runs, the vendor numbers are assigned like this: 10, 20, 30, 40, 50...
7. Click GO (CTRL+G).
The customer numbers are renumbered and increment sequentially.
Assigning customer numbers sequentially to a specific segment
1. Open Connect Utility Management > Customers > Change Customer Numbers.
2. Click to select Change Multiple Customers.
3. Click to select Assign Customer Numbers Sequentially.
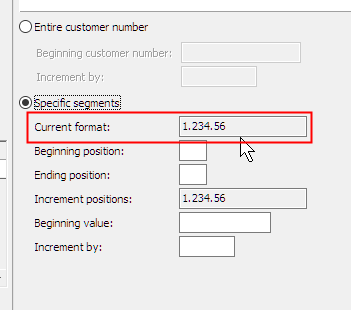
4. Click to select Specific Segments.
The Current Format displays the customer number as it presently appears in the database. Each position in the segment is assigned to a number. Position 1 is 1, position 2 is 2, position 3 is 3, and so on. Therefore in the customer number that displays in the Current Format, there are three segments. Segment 1 is one digit and starts with position 1 and ends with position 1; segment 2 is three digits and starts with position 2 and ends with position 4; and segment 3 is two digits and starts with position 5 and ends with position 6.
6. Enter the Beginning Position.
Use the first digit in the segment to assign the Beginning Position.
7. Enter the Ending Position.
Use the last digit in the segment as the Ending Position.
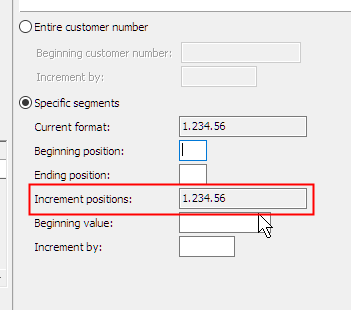
8. Enter the Increment Positions.
The Increment Positions displays the segment that is selected by the Beginning Position and Ending Position, like this
Current format: 1.234.56
Beginning position: 2
Ending position: 4
Increment position: 234
9. Enter the Beginning Value.
Use Beginning Value is the first number to assign as the selected segment.
10. Enter the Increment By.
Increment By is the value to increase a value or number. For example, Jane wants to increase vendor numbers in increments of 10. She uses 10 as the New Beginning Vendor Number and enters 10 in the Increment By field. When the routine runs, the vendor numbers are assigned like this: 10, 20, 30, 40, 50...
11. Click GO (CTRL+G).
The routine uses the settings to renumber the selected segment in the customer number.
Copyright © 2025 Caselle, Incorporated. All rights reserved.