How do I add/remove assemblies?
Organization
An assembly is composed of many inventory items. For example, a water main uses a couple of meters, couplings, meg lugs, and about 1,500 feet of PVC pipe. All of those items - the meter, couplings, meg lug, and pipe - are recorded as individual inventory items but you can use an assembly to group those items together so you can issue all of the inventory that is needed to create a water main simply by requesting the assembly code that is labeled water main.
Important! The master assembly records are stored in the Materials Management > Assembly. The interface to Materials Management 4.x must be turned on to access assembly information in the Project Accounting application.
Adding an assembly
Create a new record for an assembly.
Do this...
1. Open Connect Project Accounting > Organization > Assemblies.
2. Click New (CTRL+N).
3. Fill in the assembly properties.
4. Click Save (CTRL+S).
The assembly is saved.
Changing an assembly
Edit the properties assigned to an assembly.
Do this...
1. Open Connect Project Accounting > Organization > Assemblies.
2. Use the Lookup bar to enter an assembly code. Press Enter.
3. Now, you can update the record.
4. Click Save (CTRL+S).
The assembly is updated.
Deleting an assembly
You cannot delete an assembly when related transactions exist.
Do this...
1. Open Connect Project Accounting > Organization > Assemblies.
2. Use the Lookup bar to enter an assembly code. Press Enter.
3. Click Delete (CTRL+D).
The assembly is deleted.
Options
Assembly code
The assembly code is a unique title, or code, that belongs to an assembly. The assembly code needs to be set up before you can use it to set up an assembly.
What do you want to do?
I want to use an existing assembly code. Use the Assembly Code field to enter it, or use the Assembly Code menu to select Search.
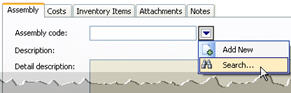
Help me find an assembly code. Use the Assembly Code menu to select Search. Now, use the Search form to select an option. Click OK.
I want to add a new assembly code. Use the Assembly Code menu to select Add New. Now, use the Assembly Code form to fill in the assembly code properties. Click Save (CTRL+S), and then click Close to return to the previous screen.
I want to change the properties on an existing assembly code. Use the Assembly Code menu to select Modify. This option is only available in Edit mode.
Asset number, description, classification, and department
An asset is an economic resource that is owned or controlled by an organization. Use the following fields to fill in the asset properties.
Asset number – The asset number is a unique number that is assigned to an asset. Use the Assets field to define the value to assign to the job when the job is closed. Use YYYY or YY to represent the year. Use U as a unit placeholder. The year and units will be set at the time the job is closed.
Asset description – The asset description is a phrase or title that describes the asset.
Asset classification – The asset classification is a systematic arrangement in groups or categories according to an established structure.
Asset department – The asset department is the name of the department that is responsible for the asset.
Category
A category is distinct class to which the assembly code belongs to.
What is the category?
I want to select a category code. Use the Category field to select a category name.
I need to add a new category. Use Connect Materials Management > Organization > Category to add a new category record.
Crew rate
The crew rate is the crew code and labor rate for the assembly. For example, the Crew Code is Electric and the Labor Rate for Electric is $21.00. When you select the Crew Rate the drop-down list will display Electric ($21.00).
What is the crew rate?
I want to use an existing crew rate. Use the Crew Rate drop-down list to select an option.
I want to add a new crew rate. Open Organization > Crew Rate and click New (CTRL+N). Fill in the crew rate properties, then click Save (CTRL+S).
I want to change properties on an existing crew rate. Open Organization > Crew Rate. Use the Lookup bar to enter a crew code. Now, make your changes to the record.
Department
A department is a section of an organization that handles a particular job or functions in a particular manner. The Department field displays the default department for the assembly code.
What do you want to do?
I want to use the default department. Continue to the next step.
I want to use a different department. Use the Department drop-down list to select another department.
I want to add a department to the list. Open Organization > Departments and click New (CTRL+N). Fill in the department properties, then click Save (CTRL+S).
Description and Detail Description
A description is a word or phrase that describes the character or features of the record. The Description and Detail Description fields displays the default descriptions for the related Assembly Code.
Install/removal costs
An install cost is a charge for situating an assembly at a physical location. While a removal cost is a fee for taking an assembly away from a location. Use the fields on the Costs tab to enter the amounts for installing and later for removing the assembly.
Labor hours – Enter the number of hours to install/remove the assembly.
Labor cost – This field calculates the Crew Code x Labor Hours.
Labor benefit cost – This field calculates Labor Cost x Install Hours.
Equipment hours – Enter the number of hours to install/remove the assembly.
Equipment cost – Enter the equipment costs for installing/removing the assembly.
Inventory cost – This field calculates Inventory Quantity x Inventory Current Unit Cost.
Other cost – If there are any miscellaneous fees for installing/removing an assembly, use the Other Cost field to enter the additional amount.
Inventory items
The Inventory Items grid, located on the Inventory Items tab, uses the interface to Materials Management to display the inventory items that make up the assembly. The information in the grid is view only.
How do I update the inventory items in an assembly?
Use Connect Materials Management > Organization > Assemblies to look up the assembly code. Use the options on the Inventory Items tab to add inventory, remove inventory, edit quantity, or change the display order.
Copyright © 2025 Caselle, Incorporated. All rights reserved.