How do I enter budget worksheet amounts?
Budget Worksheet
Make budget entries for a single period or multiple periods. The budget entries will be tied to a budget for a fiscal or calendar year. Usually, an organization enters budget entries at least once a year to prepare a budget.
Watch a video
-
Learn about the Enter Budget Amounts and Enter Budget Worksheet Amounts view. Watch a video (3m15s)
Entering budget worksheet amounts in a single period
1. Open Connect General Ledger > Budgeting > Enter Budget Worksheet Amounts.
2. Set up the selection criteria.
Period: Select a period from the list.
Budget level box
3. Enter the budget amounts.
Use the budget worksheet to enter amounts. To learn more about the budget worksheet, see Entering Amounts In a Single Period.
4. Click Save (CTRL+S).
The budget amounts are saved.
202005, 2020Mar26
Entering budget worksheet amounts in multiple periods
1. Open Connect General Ledger > Budgeting > Enter Budget Worksheet Amounts.
2. Set up the selection criteria.
Period: Click the Multiple Periods link and then select the periods to show in the budget entry worksheet.

Multiple periods link
3. Enter the budget amounts.
Use the budget worksheet to enter amounts. To learn more about the budget worksheet, see Entering Amounts In Multiple Periods.
4. Click Save (CTRL+S).
The budget amounts are saved.
202005, 2020Mar26
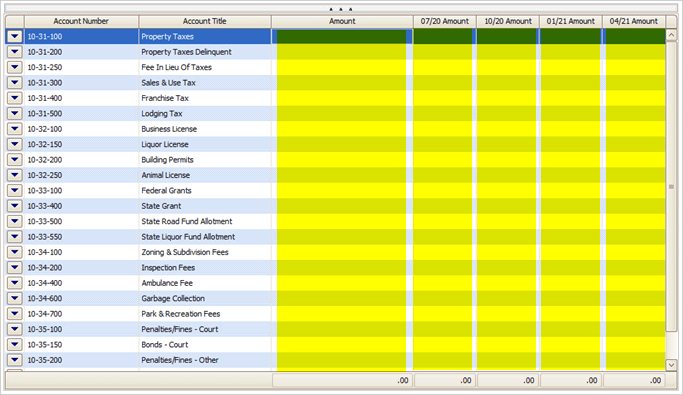
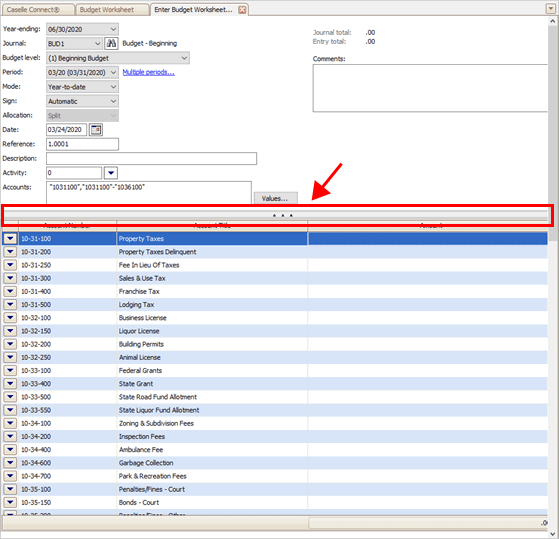
Entering amounts in the budget worksheet
You'll find the budget worksheet at the bottom of the Enter Budget Worksheet Amounts view. It's set up using the options that you have selected in the top part of the form. The number of periods that display in the worksheet, depend on the option that was selected from the Periods list.
Entering amounts in a single period
If you're entering amounts for a single period, use the Amount column to enter an amount for each GL account. Click on box and then type in an amount.

Worksheet for entering amounts for a single period
Entering amounts in multiple periods
If you're entering amounts for multiple periods, the worksheet will show the Amount column and a column for each period. When you enter an amount in the Amount column, Connect will use the allocation method that you have selected to split the amount between the periods, copy (duplicate) the amount to each period, or manually enter the amount for each period.
Worksheet for entering amounts for multiple periods
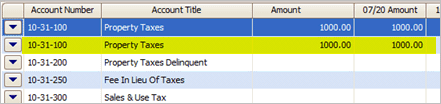
Duplicating amounts
Copy and paste a row in the worksheet.

Duplicate row
The new row is inserted below the row that you have selected.
Duplicated row is highlighted
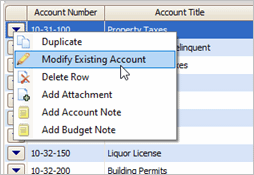
Changing account properties
Look up the account to make changes to the account properties. Using this option will show the account in Modify Existing Accounts. For example, changing the account properties to allow budget amounts, viewing account notes, viewing budget notes, and so on.
Modify existing account
Deleting a row
Delete the selected row from the worksheet.
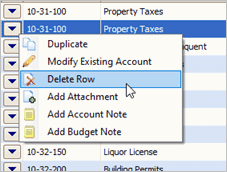
Delete row
The selected row is removed
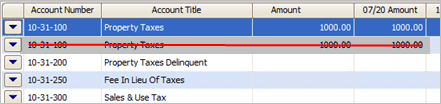
Deleted row
Adding attachments
Add a file, image, or document to the GL account. Select Add Attachment from the menu, and then...

Worksheet menu
...use the Add New Attachment window to add a file.
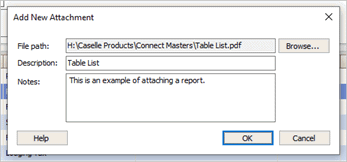
Add New Attachment window
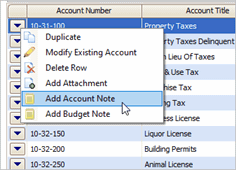
Adding account notes
Add a note to the GL account. Some reports allow you to include account notes and you can display account notes in inquiry.
Worksheet menu
Adding budget notes
Add a note to the budget. Some reports allow you to include budget notes and you can display budget notes in inquiry.
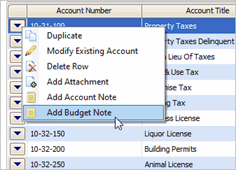
Worksheet menu
Options
Year-ending
Select the budget year end.
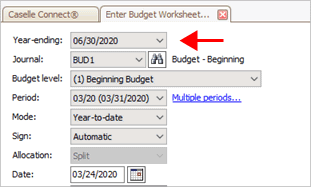
Year-ending box
Journal
Select a journal to enter budget amounts.
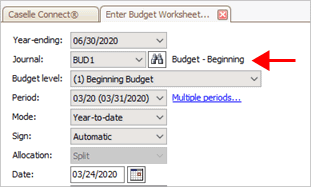
Journal box
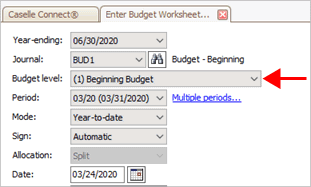
Budget level
Select the budget level to post budget items.
Budget level box
How do I add a budget level to the list? Use Budget Levels in Organization. See How do I add a budget level?
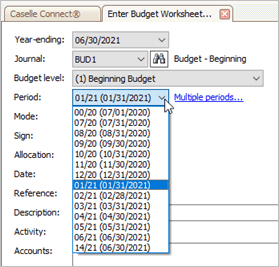
Period
Set up the periods to include on the budget worksheet. You can enter amounts for a single period or you can enter amounts for multiple periods.
Single period
To enter budget amounts in a single period, use the Period box to select the GL period.
How do I switch to single period from multiple periods? If you're using multiple periods, click the Multiple Periods link and select a single period and then click OK. Now, the budget worksheet is set up to enter a single period.
Period list
Multiple periods
To enter budget amounts for multiple periods, click the Multiple Periods link.
Multiple periods link
The Multiple Periods window shows the periods that can be selected. Clicking the checkbox next a period will select it, or you can use the Select list to choose All Periods, Quarterly Beginning Periods, or Quarterly Ending Periods.
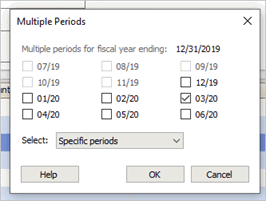
Multiple periods window
When you click OK, the worksheet will display an extra column for each period that you have selected.
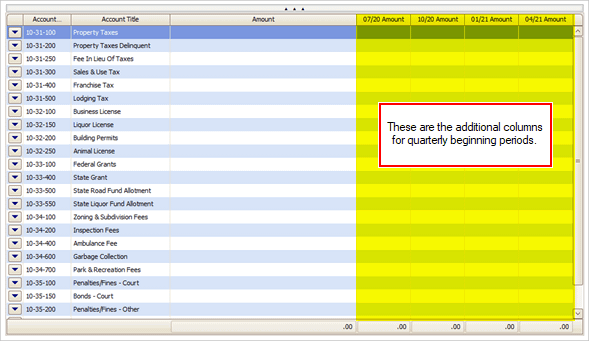
Worksheet is set up for quarterly beginning periods
Mode
You can use Normal mode or Year-to-Date mode to enter amounts. The mode determines how the worksheet calculates amounts.
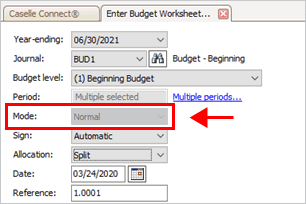
Mode box
Use Normal mode to enter the "net charge". Connect will enter the adjustment amount. To view an example, click here.
Transaction Entry = Adjustment Amount
Use Year-to-Date mode to enter the budgeted amount. Connect will calculate the difference between the current year-to-date balance and the budgeted amount. To view an example, click here.
Transaction Entry = Current YTD Balance - Budgeted Amount
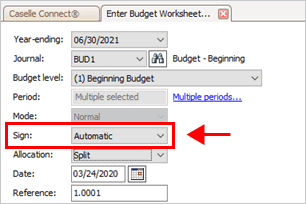
Sign
Choose which sign to assign to amounts.
Sign box
Use Normal to use the sign that is normally associated with the GL account.
Use Reverse to use the opposite sign from the sign that is normally associated with the GL account.
Use Automatic to look at the sign that is normally associated with the GL account and then use the appropriate sign to create a debit transaction or credit transaction. For example, Jane wants to enter all budget amounts as positive amounts. She selects Automatic as the Sign. When she enters a budget amount, Connect looks at the sign on the GL account. If GL account has a normal balance of credit, Connect changes the sign on the amount to show credit. On the other hand, if the GL account has a normal balance of debit, Connect will change the sign on the budget amount to debit.
Allocation
The allocation type is how the amount that you enter is allocated to the periods that are included in the budget worksheet.
Why can't I select an allocation? The Allocation box is only available when the budget worksheet is set up to enter multiple periods.

Allocation box
Duplicating amounts
Use Duplicate to copy the budget amount and paste it as the budget amount for each period in the same GL account in each of the selected periods. To learn more, click here.
Entering manual amounts
Use Manual to allow a user to enter budget amounts for each of the selected periods. To learn more, click here.
Splitting amounts
Use Split to enter a budget amount that Connect will divide between the selected periods and round to the nearest whole dollar. If the budget amount does not divide evenly, the last period will receive the remaining amount. To learn more, click here.
Date
Enter the transaction date.
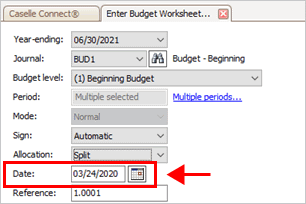
Date box
Reference
This is the reference number that's assigned to the budget worksheet.
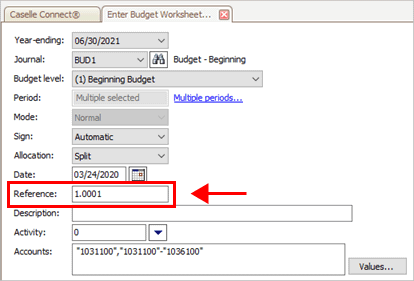
Reference box
In New mode, the Reference box displays the next available reference number. You can assign a different reference number, but you must use a number that is not assigned to previous transaction.
In Edit mode, use the Reference box to enter a reference number.
Description
Enter a transaction description. Press the (+) key on the keyboard to enter the previous value.
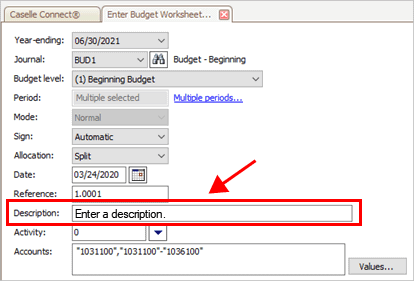
Description box
Activity
If you're using activity codes, enter a GL activity code. Press the (+) key on the keyboard to enter the previous value.
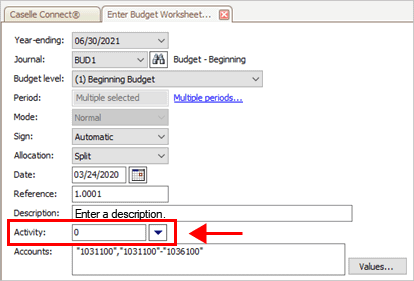
Activity box
Accounts
Enter the GL accounts to include on the worksheet. You will need to enter a quotation mark before and after each GL account. Press the (+) key on the keyboard to enter the previous value.
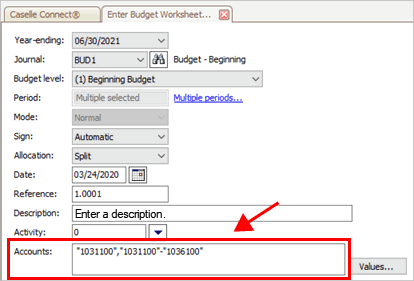
Accounts box
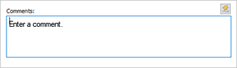
Comments
Use the Comment box to enter a comment. The comment is linked to the journal transaction.
Comments box
Clicking the Comment History  button will show the comments that have been linked to previous journal transactions. Selecting a comment from the list will copy the comment to the current journal transaction.
Comment History button
Show/Hide worksheet
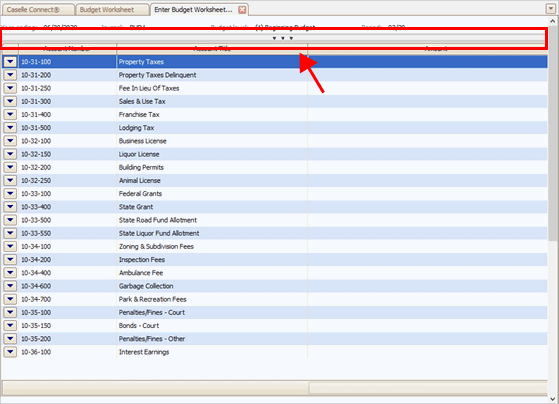
After you're finished setting up the worksheet options, click  to hide the options portion of the view and expand the worksheet for entering amounts.
With collapsed worksheet entry view
Click again to show the options portion of the view and collapse the worksheet entry grid.
Expanded worksheet entry view
Copyright © 2020 Caselle, Incorporated. All rights reserved.