How do I set up my Organization settings?
Use Organization to set up the organization’s name and address, default options, and interfaced applications.
Watch a video
Check on Demand Refresher Training (50m43s)
Topic |
Time Marker |
Required Check Number |
|
Auto-increment Check Number |
1m26s |
Keep Days of History |
01m59s |
Interfaces |
03m18s |
Passwords |
05m16s |
Tracking |
05m55s |
User-defined Fields |
05m53s |
Updated 19Oct2018
Changing the organization's contact information
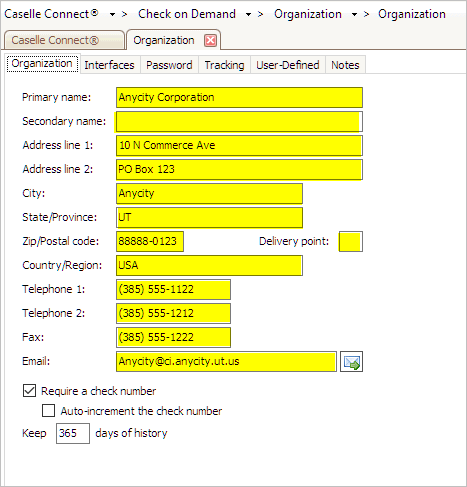
The organization's name and contact information is stored in Organization. The application will print this name and address on reports, forms, lists, notices, bills, and so on.
Enter the organization’s information in the following fields:
Primary and secondary name
Address
Telephone, Fax, and Email
Do this...
1. Open Connect Check on Demand > Organization > Organization.
2. Use the fields on the Organization tab to update the organization's contact information.

Contact Information in Organization
3. Click Save (CTRL+S).
The updated contact information is saved.
Updated 22Jan2018
Requiring a check number
When you use Check on Demand, you have the option of entering checks and then printing the checks that you entered as a batch print job or entering a check and printing it immediately afterward. The default setting for printing checks is stored in the Organization table.
If you choose to batch print checks, in other words, you want to enter multiple checks and then print all of the checks at the same time, Connect will
Assign zero (0) as the check number.
If you chose to enter a check and then print it, Connect will
Record the check number that you assign to the check, unless
the check number will auto-increment, and then Connect will use the next available check number in the Check on Demand application.
Do this...
1. Open Connect Check on Demand > Organization > Organization.
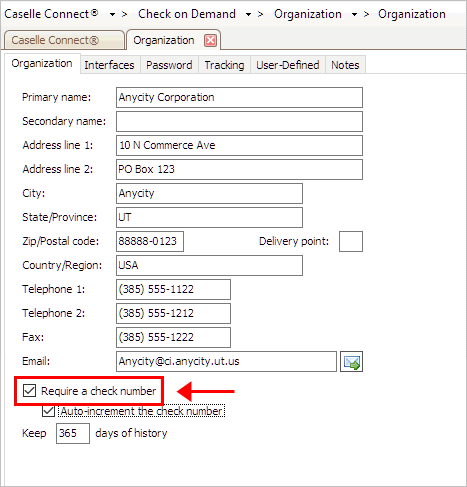
2. Click to select the checkbox titled Require a Check Number.

Require a Check Number checkbox in Organization
How do you want to print checks?
I want to enter checks and then print them as a batch. Do not select the checkbox titled Require a Check Number.
I want to enter a check and print it. Select the checkbox titled Require a Check Number and set up the option to auto-increment the check number.
3. To show the next available check number in the Check Number field, click to select the checkbox titled Auto-increment the Check Number.
When this option is selected, Connect will look for the check number with the highest value. It will use that check number as the starting check number.

Auto-increment the Check Number checkbox in Organization
4. Click Save (CTRL+S).
The default setting is saved.
Updated 19Jun2018
Keeping transaction history
Use Keep [ _ ] days of history to determine how long to keep transactions in the database. Users cannot delete transactions before the number of days of history has elapsed.
For example, if Jane wants to save transactions for one year. Jane would enter 365 in the Keep [ _ ] Days of History field. Jane uses 365 because there are 365 days in a year. At the appropriate time, Jane runs Organization > Delete History to remove old transactions from the database.
Note: Deleting history is part of regular upkeep and maintenance of the database. Choosing to keep for excessive period, or forever, may affect system performance.
Do this...
1. Open Connect Check on Demand > Organization > Organization.
2. Use the field titled Keep x Days of History to enter the number of days.

Keep x Days of History in Organization
Do you want to keep transactions?
Yes, I want to keep transactions. Use the Keep [ _ ] Days of History field to enter a number. Example: To keep one year of history, type in 365.
No, allow users to delete transactions right away. Enter 0 (zero) in the Keep [ _ ] Days of History field.
3. Click Save (CTRL+S).
The period to keep history is saved.
Updated 22Jan2018
Setting up interfaces to Connect applications
Configure the Check on Demand application to retrieve account information from an interfaced application or update information to an interfaced application.
Retrieve information from these applications:
Accounts Payable
Accounts Receivable
Animal License
Business License
Cemetery Management
Community Development
Court Management
Property Improvements
Property Tax Collection
Update information to this application:
General Ledger
Community Development, Court Management, Property Improvements, and Property Tax Collection
Set up the Check on Demand interface to these Connect applications.
Do this...
1. Open Connect Check on Demand > Organization > Organization.
2. Click the Interfaces tab.

Interfaces tab in Organization
3. Select the tab labeled with the application name.

Application Name tabs in Organization
4. Use the Interface menu to select Caselle 4.x

Interface menu in Organization
5. Click Save (CTRL+S).
The Check on Demand interface to the selected application is set up and saved.
Updated 22Jan2018
General Ledger Interface
Set up the interface to post transactions created in Check on Demand to the Connect General Ledger.
Do this...
1. Open Connect Check on Demand > Organization > Organization.
2. Click the Interfaces tab.
3. Click the General Ledger tab.

General Ledger tab in Organization
4. Use the Interface menu to select Caselle 4.x

Interfaces in General Ledger Interface
5. Use the Void Account field to enter the GL account for recording void checks. amounts from checks that are canceled or deleted before the check is cashed.

Void Account in General Ledger Interface
6. Click Save (CTRL+S).
The General Ledger Interface is set up and saved.
Updated 22Jan2018
Payroll Interface
Set up the interface to create checks for employees, transmittals, or both in Connect Payroll.
Do this...
1. Open Connect Check on Demand > Organization > Organization.
2. Click the Interfaces tab.
3. Click the Payroll tab.

Payroll tab in Organization
4. Use the Interface menu to select Caselle 4.x

Interfaces in Payroll Interface
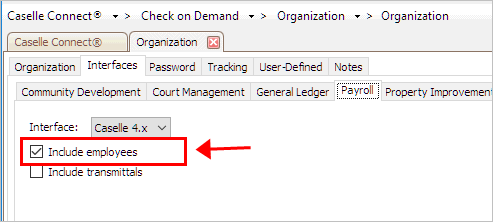
5. To use Check on Demand to create checks for employees, select the checkbox titled Include Employees.

Include Employees in Payroll Interface
6. To use Check on Demand to create checks for transmittals, select the checkbox titled Include Transmittals.

Include Transmittals in Payroll Interface
7. Click Save (CTRL+S).
The Payroll Interface is set up and saved.
Updated 22Jan2018
Setting up passwords
See the help topic titled How do I change application-level passwords?
Updated 19Jun2018
Tracking fields
How do I print the Management Tracking Report?
How do I set up Management Tracking?
Updated 08Jan2018
Watch a video to see an example of using tracked fields in Check on Demand (57s)
Updated 19Jun2018
User-defined fields
How do I add a user-defined field?
How do I change the display order of user-defined fields?
How do I change the name of a user-defined field?
How do I change the user-defined field properties?
How do I delete a user-defined field?
How do I test a user-defined field?
How do I test a user-defined field?
Updated 22Jan2018
Watch a video to see how to set up a user-defined field in Check on Demand (1m36s)
Updated 19Jun2018
Copyright © 2025 Caselle, Incorporated. All rights reserved.