Set up a recurring billing.
A recurring billing is a billing that is created for a customer at regular intervals. First, you'll need to set up a recurring billing. The Recurring Billing record stores when and how the invoice is created. Then, you need to link the recurring billing to the customer using Customers > Modify Existing Customers.
An example of a common recurring billing is the monthly fee to use a recreation center.
1. Open Connect Accounts Receivable > Organization > Recurring Billings.
2. Click New (CTRL+N).
The form clears.
3. Enter the Recurring Code.
The Recurring Code is a name or number that is assigned to the recurring billing code.
What is the recurring code?
Use the Recurring Code field to enter a name (30 characters or less).
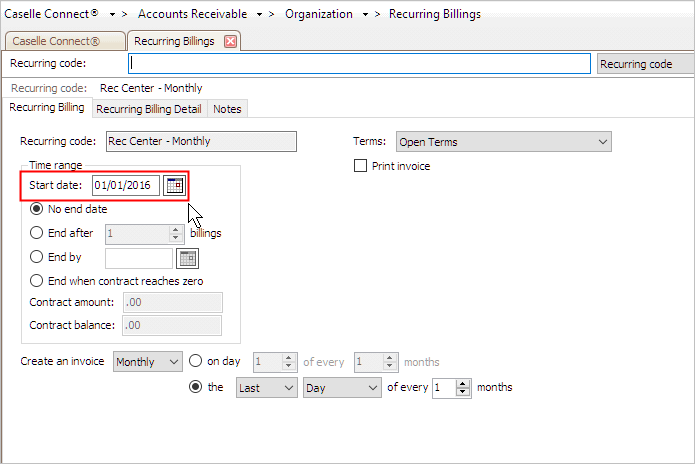
4. Enter the Start Date.
The start date is the date when the record is active.
When do you want to start the recurring billing?
Today. The Start Date displays the current date. Continue to the next step.
A future or past date. Use the Start Date field to enter a MM/DD/YYYY. You will not be able to select the recurring billing prior to the date entered.
5. Enter the End Date.
The end date is the date when the record is not active.

When do you want to end the recurring billing?
Never. Click No End Date.
After x billings. Click End After, and then enter the number of billings in the recurring billing cycle in the End After [ _ ] Billings field. .
On a specified date. Click End By, and then enter the date of the last recurring billing in the End By field.
When the contract balance is zero. Click End When Contract Reaches Zero. Use the Contract Amount field to enter the amount to be billed on each recurring billing. The Contract Balance field displays the amount that needs to be paid.
6. Set up the Create an Invoice options.
Use Create an Invoice to define when an invoice will be created for the recurring billing. In the following example, the options are set up to create an invoice on the first day of every month.
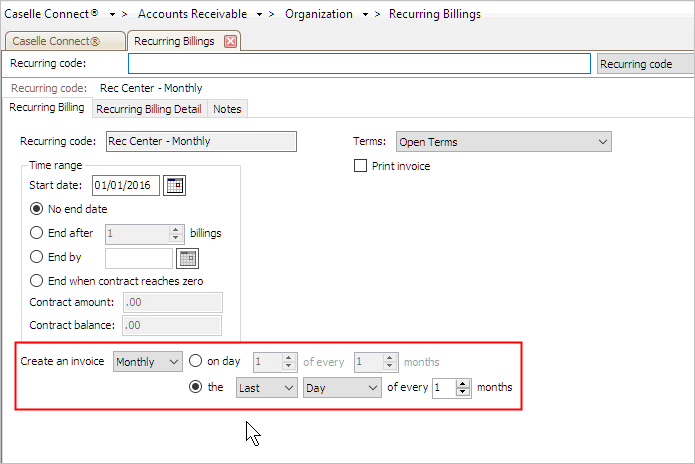
You can change the options to invoice as often as once every day to once every year.
7. Select the Terms.
A term defines the terms and conditions for payment, including payment due dates, discounts, and payment period.
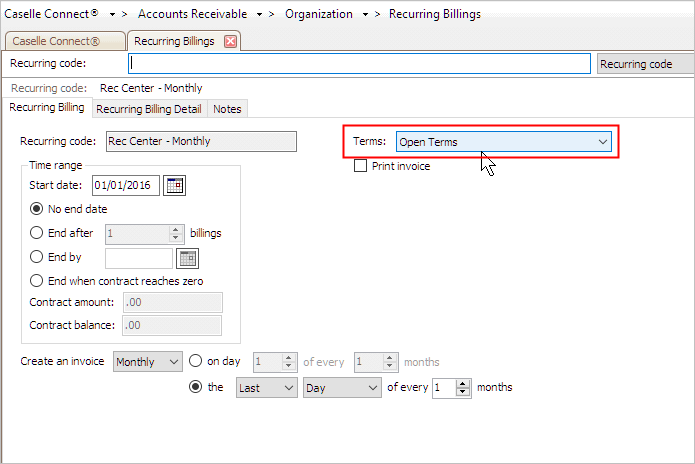
What are the terms for payment for this recurring billing?
I want to select the terms. Select the appropriate payment terms from the Terms drop-down list.
I need to set up a new term. Use Organization > Terms to add the new term.
8. Set up the Print Invoice checkbox.
Use Print Invoice to print an invoice when this recurring billing is created.
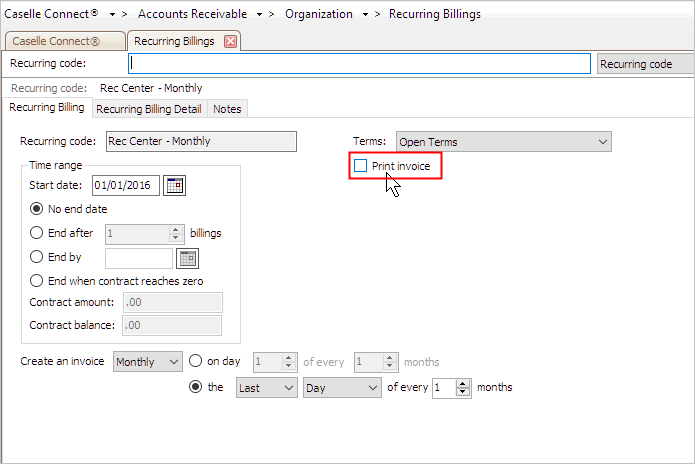
Do you want to print an invoice?
Print an invoice. Click to select Print Invoice on the Recurring Billing tab.
Do not print an invoice. Click to clear Print Invoice on the Recurring Billing tab.
9. Click the Recurring Billing Detail tab.
Use the Recurring Billing Detail to add, change, or remove items that will appear on the invoice.
10. Click Add a New Recurring Billing Detail button.
It looks like the New button but it's located on the Recurring Billing Detail tab and not on the main toolbar.
The Recurring Billing Detail form clears.
11. Fill in the Recurring Billing Detail form.
12. Click Save (Ctrl+S).
The recurring billing is set up.