How do I add/remove a remittance address?
Set up the address to remit items.
Connect uses the vendor's primary address as the default remittance address. You can add another remittance address if the vendor does not use their primary address as the remittance address.
Adding a remittance address
1. Open Connect Accounts Payable > Vendors > Modify Existing Vendors.
2. Use the Vendor box to enter a value. Press Enter.
You can enter the vendor name, vendor number, or a vendor's secondary name.
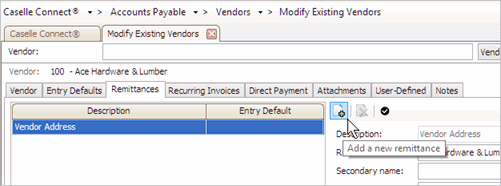
3. Click to select the Remittances tab.
4. Click Add a New Remittance.

Add a New Remittance button
Connect adds a new line to the pane on the Remittances tab.
5. Fill in the remittance information in this section.

Remittance information on the Remittances tab
6. Select the default remittance address.
Is this the default remittance address?
-
Yes, this is the default remittance address. Click Set Selected Remittance as the Entry Default. When you select the vendor, Connect will use this address as the remittance address.

Set Selected Remittance as the Entry Default button
-
No, this is not the default remittance address. Continue to the next step.
7. Click Save (CTRL+S).
The remittance address is saved.
202008m, 20200Apr14
Removing a remittance address
1. Open Connect Accounts Payable > Vendors > Modify Existing Vendors.
2. Use the Vendor box to enter a value. Press Enter.
You can enter the vendor name, vendor number, or a vendor's secondary name.
3. Click to select the Remittances tab.
The pane on the Remittance tab displays a list of remittance addresses for the vendor.
4. Click to select the remittance address that you want to delete.
5. Click Remove the Selected Remittance.

Remove the Selected Remittance button
The remittance address is deleted.
202080, 2020Apr14
Copyright © 2025 Caselle, Incorporated. All rights reserved.