How do I enter requisitions?
Create a requisition entry in Accounts Payable.
Set up a requisition to request goods and services from a vendor.
Entering requisitions
1. Open Connect Accounts Payable > Purchases and Requisitions > Enter Requisitions.
Connect uses the next available requisition number and current date.
2. Enter the Requested By.
This user is requesting the requisition. This is a self-validating field. You can type in a new user name or use the drop-down list to select from a list of previous entries.
3. Enter the Vendor.
This vendor will fill the requisition. Use the menu button at the end of the field to view additional information, add a new vendor, modify an existing vendor, or search for a vendor.
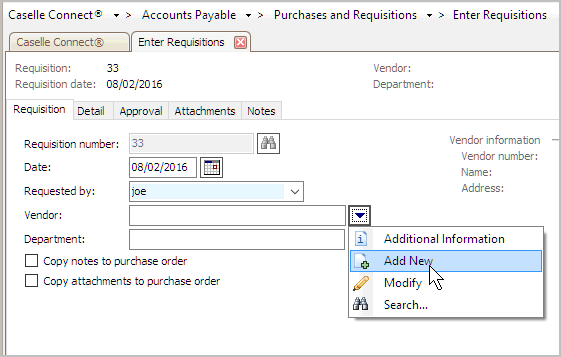
Add New from the Vendor options menu
4. Enter the Department.
This is the department requesting the requisition. If an approval process is set up for the selected department, Connect will assign the requisition to the department's approval process.
5. Set up the checkbox titled Copy Notes to Purchase Order.
You can set up the requisition properties to copy the text from the Notes tab of the requisition to the Notes tab on the purchase order. If you use this option, all of the requisition notes will be copied to the purchase order. If you choose not to use this option, none of the requisition notes will be copied to the purchase order.
What do you want to do?
I want to copy the notes. Click to select the checkbox titled Copy Notes to Purchase Order.
I do not want to copy the notes. Click to deselect the checkbox titled Copy Notes to Purchase Order.
6. Set up the checkbox titled Copy Attachments to Purchase Order.
You can also copy the attachments that are linked to the requisition to the purchase order that will be created using the requisition. If you select this option, Connect will link all of the attachments assigned to the requisition to the new purchase order.
What do you want to do?
I want to copy all of the attachments. Click to select the checkbox titled Copy Attachments to Purchase Order.
I do not want to copy any attachments. Click to deselect the checkbox titled Copy Attachments to Purchase Order.
7. Enter the items on the requisition.
Use the options on the Detail tab to add items to the requisition.
Click to select the Detail tab.

Detail tab
Enter the Required By.
This is the date when you need the items delivered.
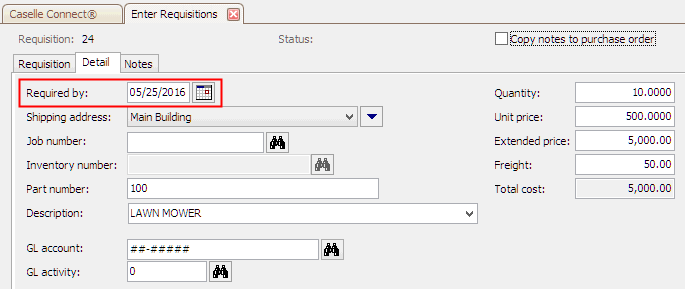
Required by
Select the Shipping Address.
This is the location where you want the item delivered.
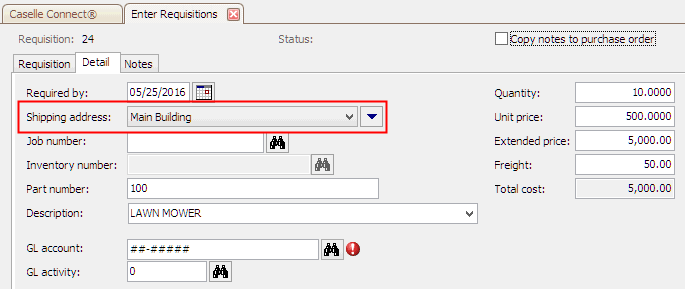
Shipping address
Enter the Part Number and Description.
This is the part number and description of the requested item. The part number is a number or code that is assigned to the item that you are ordering. A description is the name of the item.

Part number and description
Enter the GL account.
A GL account is an account in the General Ledger that records credits and debits for the item.

Enter the Quantity, Unit Price, Extended Price, and Freight.
Enter the quantity to order, unit price of each item, and freight. Connect will calculate the extended price and total cost.
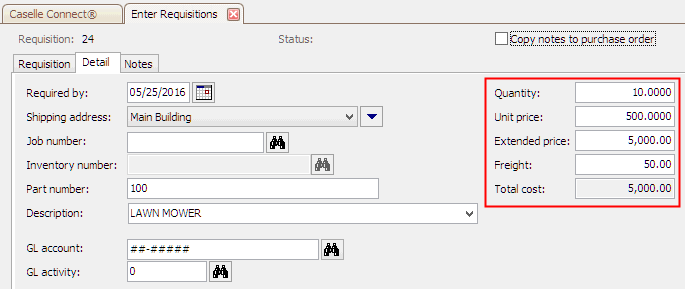
Quantity, unit price, extended price, and freight
The item is listed in the transaction grid.
When an item is finished, Connect adds another row to the transaction grid. The row summarizes the item details.
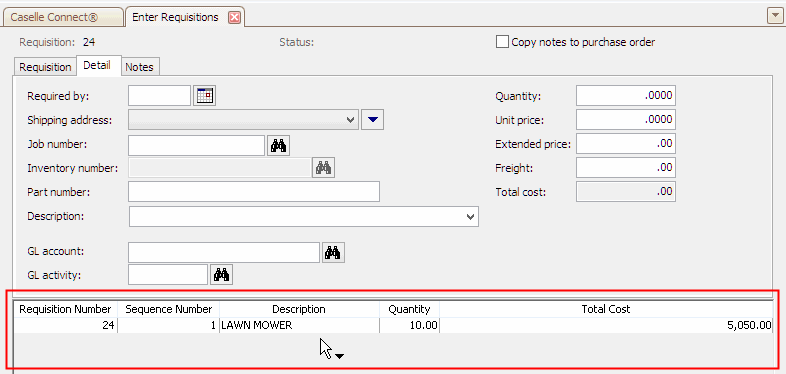
Requisition grid
Repeat these steps to add another item to the requisition.
6. When you're done entering the requisition items, click Save (CTRL+S).
The requisition is saved.