How do I set up an Amazon S3 account? (2024.08)
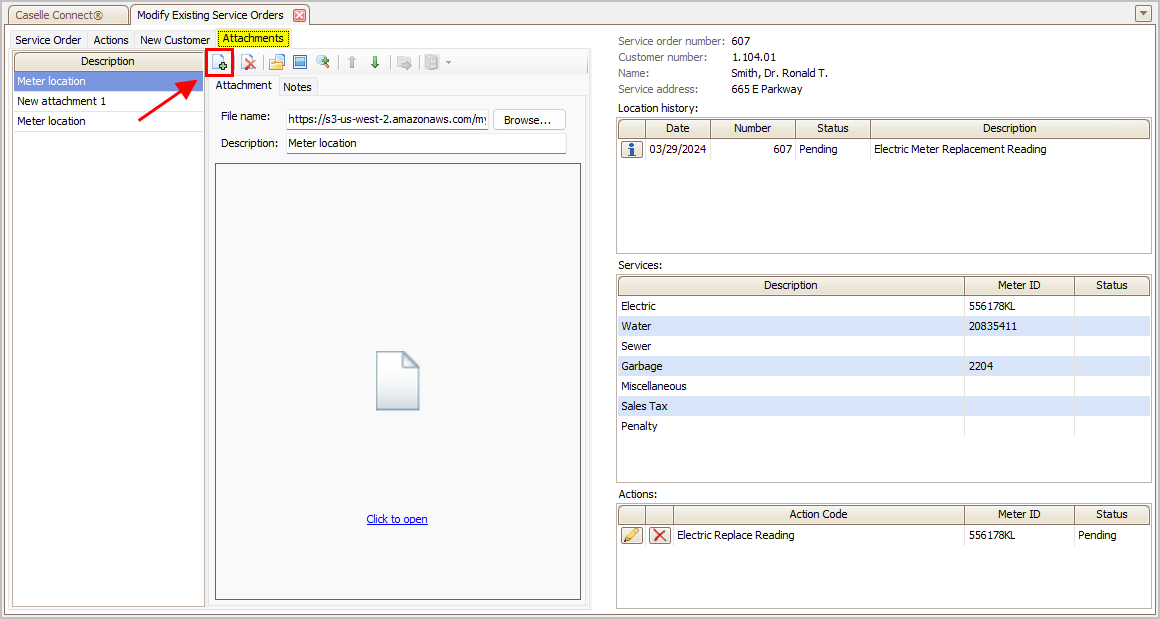
Attachments
An Amazon S3 (Simple Storage Service) Account is a content delivery solution for storing and retrieving data. You can save images and files to your S3 account so you can view them in Connect and Connect Online. If you add an attachment in Connect and you're not using a content delivery network, such as Amazon S3, you'll only be able to access the attachment in Connect.
Important... The free Amazon S3 account does not encrypt files. Uploaded and attached documents should not include sensitive information. If your organization needs to store documents with sensitive information, you should use Revver for secure document management.
Before you get started
-
Do I need Amazon Prime to set up an Amazon S3 account? No, you can set up an Amazon S3 account without Amazon Prime. You do not need Amazon Prime. Amazon S3 is a separate service offered by Amazon.
-
Why do I need a credit card? The free Amazon S3 account provides 5 GB of free storage. If you exceed 5 GB of stored files, Amazon will bill an additional amount to the credit card saved in the S3 account. Usually, 5 GB is sufficient for most sites.
This help topic was updated with new instructions for the 2024.08 release.
First, create an Amazon S3 account
An Amazon S3 account refers to the AWS account that owns or has access to Amazon Simple Storage Service (S3) resources. When you set up an AWS account, you will gain access to all AWS services, including S3. The AWS account owner can control access to data and manage the lifecycle of the resources and handle billing for S3 usage.
Do this...
1. Open https://aws.amazon.com/s3
2. Click Create an AWS Account.

3. Fill in the form to set up a new AWS account, and then click Continue.
Second, set up storage options on the Amazon S3 account
Create a storage bucket for your S3 account. The bucket will store the attachments that are uploaded from Connect and Connect Online. Each bucket can contain an unlimited number of objects (files), such as images, documents, videos, backups, or any form of data.
Requirements:
-
Bucket names can only contain lowercase letters, numbers, periods, and hyphens.
-
Buckets must be created for the US West (Oregon) region. Connect and Connect Online support the US West (Oregon) region. Buckets created for other regions are not supported.
Do this...
1. Once your account is set up, log in, and then search for S3.
If this is your first time on the page, the Recently Visited widget will include S3 as one of the options.

2. Click Create a Bucket to add a bucket to store the online attachments.
An Amazon S3 bucket is a storage container in Amazon Web Services (AWS) that holds data and files. It's a scalable, durable, and secure cloud-based object storage solution designed to store and retrieve any amount of data from anywhere on the internet. Objects can be anything from text files, images, videos, documents, and backups.

3. Change the AWS region to US West (Oregon) and name your bucket.
Connect and Connect Online are set up to support US West (Oregon). Other regions are not supported.
What if my organization isn't located in the US West (Oregon) region? It doesn't matter where your organization is physically located, you should select US West (Oregon) as the AWS region.

Enter a bucket name for Caselle attachments. For example, my-caselle-attachments-bucket

4. For the object ownership, select ACLs Enabled. Do not make any changes to the other settings.
ACLs (Access Controlled Lists) are a way to define and manage permissions on S3 buckets and the objects they contain. An ACL specifies which AWS accounts or groups can access objects in the bucket and what level of access they have to read or write.

5. For the Block Public Access Settings for This Bucket section, make sure to uncheck the Block ALL Public Access checkbox. All of the checkboxes for the sections in Block All Public Access should be unchecked.
Do not make any changes to the rest of the settings in this section. In the warning section, you will need to confirm you are creating a disabling this option.
Why it the Block All Public Access option not selected? Selecting this option would prevent you from sharing the URLs of an attachment with others. Removing the checkmark will allow you to share the URL of an attachment by email or text message.

6. Scroll to the bottom, and then click Create Bucket.

Your new bucket is now available in your S3 account.

Third, set up bucket permissions
Amazon S3 permissions control access to S3 resources (such as buckets and objects) and define what actions can be performed on them. These permissions are managed using policies that specify which AWS identifies (users, groups, roles) or external entities (other AWS accounts, services) can access a bucket, and what actions they can take.
Do this...
1. From the Amazon S3 > Buckets page, click on the bucket that you created for Caselle attachments.
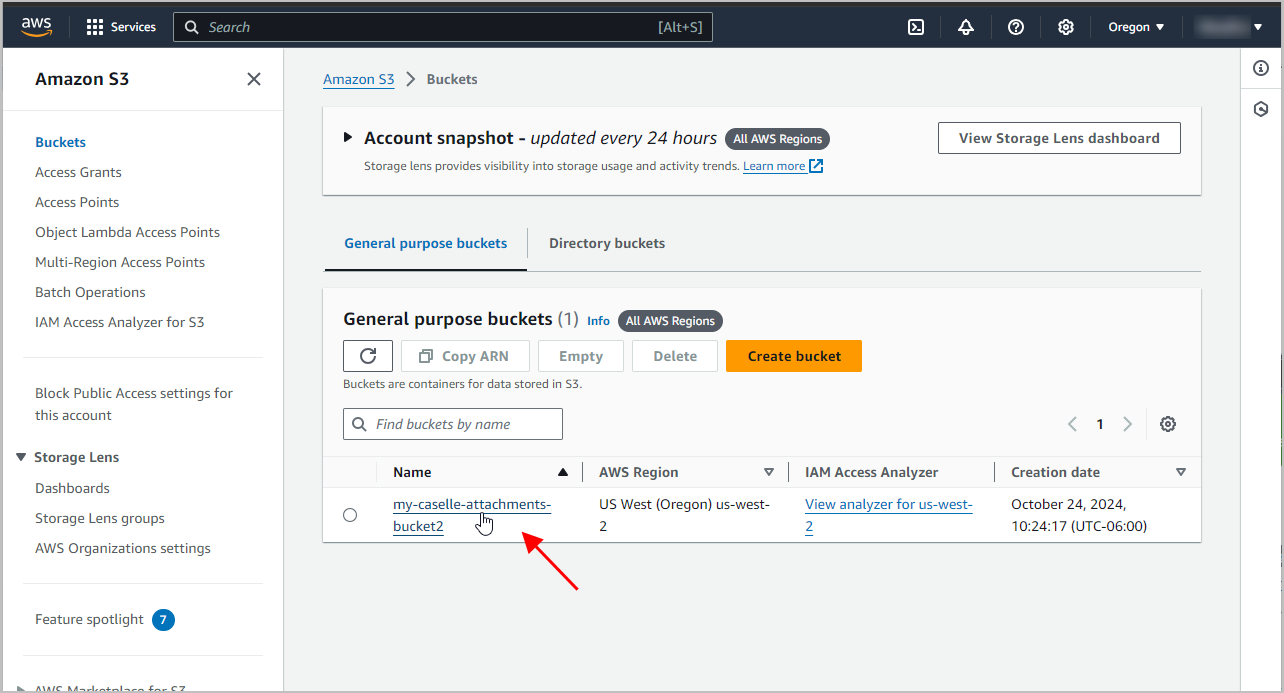
Click Permissions.

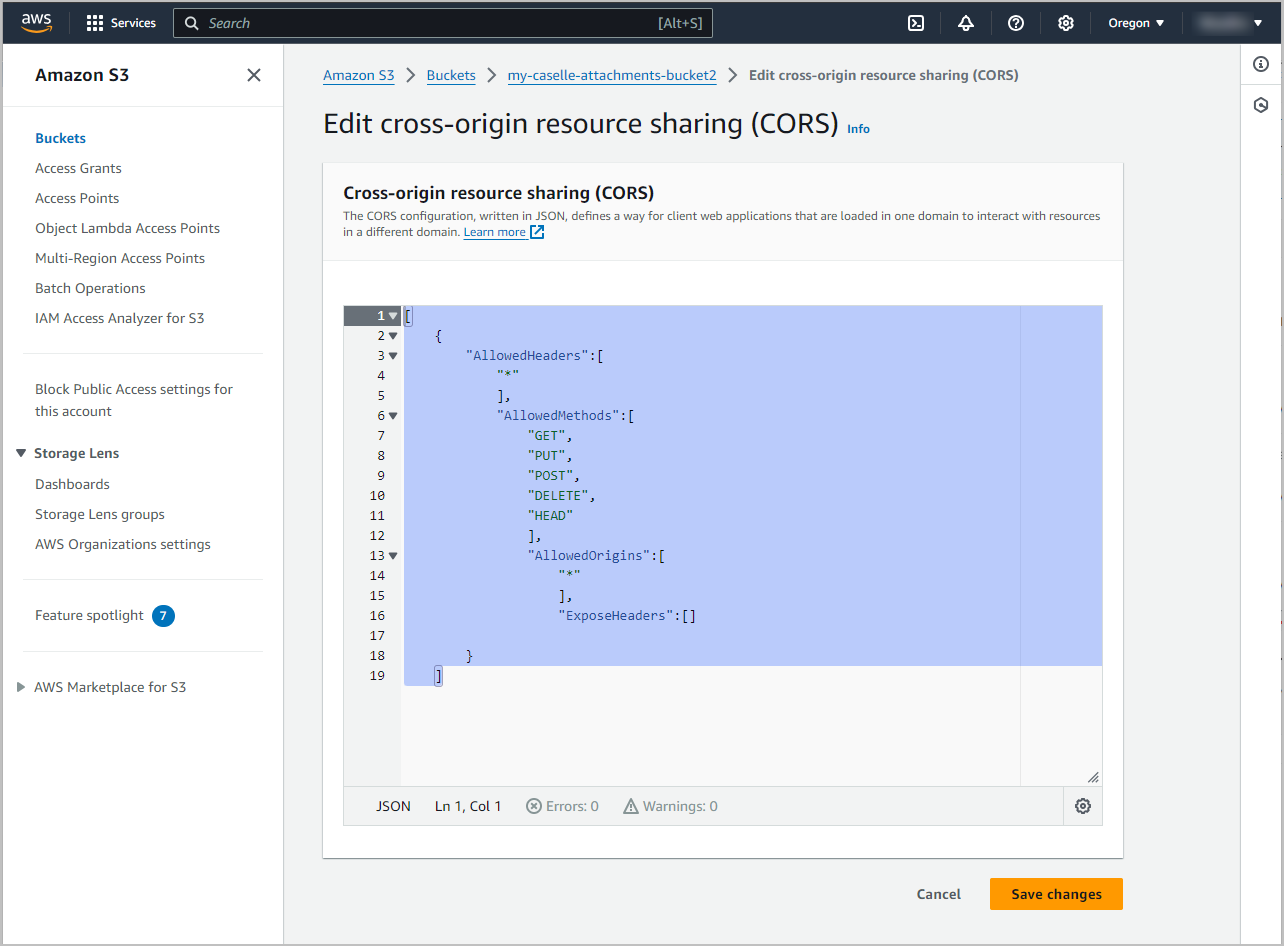
2. Scroll down to the section titled Cross-origin Resource Sharing (CORS), and then click Edit.

3. When the text editor displays, copy and paste the following snippet into the text box.
<<<Copy the text below.>>>
[
{
"AllowedHeaders":[
"*"
],
"AllowedMethods":[
"GET",
"PUT",
"POST",
"DELETE",
"HEAD"
],
"AllowedOrigins":[
"*"
],
"ExposeHeaders":[]
}
]
<<<Stop here. Do not copy this line.>>>
It should look like this, when you're done.
4. Click  .
.
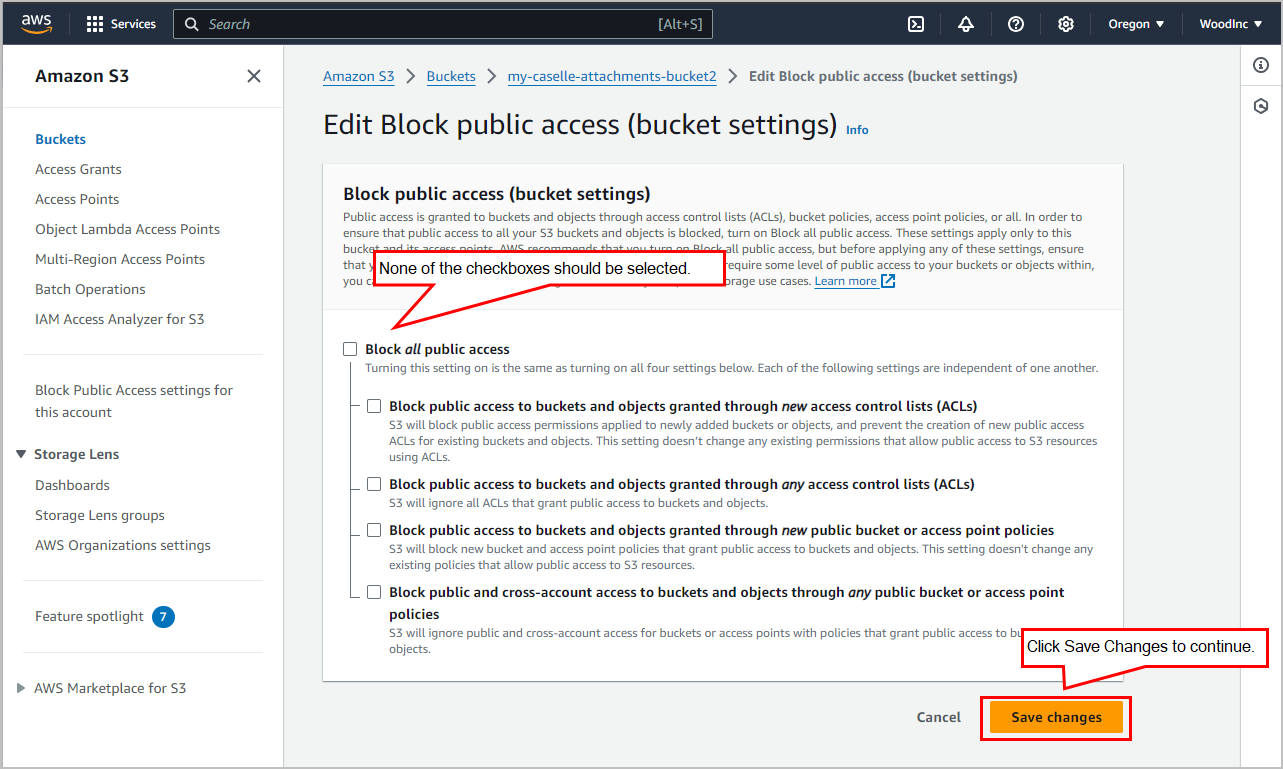
5. In Block Public Access settings (bucket settings), click Edit.
This option will set up permissions for the S3 account. It looks like the permissions that you just set up for objects contained in a bucket, but this option sets up permissions for the entire account.

6. Uncheck all of the boxes, and then click Save Changes.
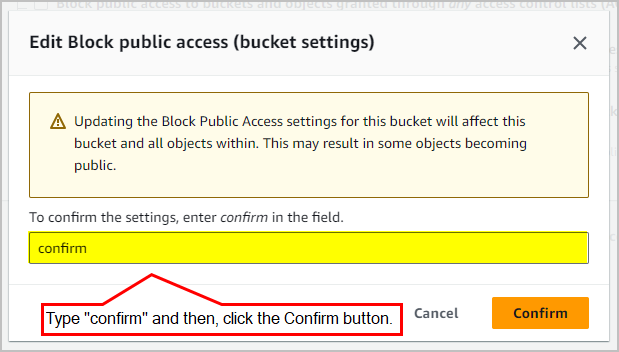
8. When the dialog box displays, type confirm, and then click Confirm.
Fourth, create a new Amazon S3 access key
An Amazon S3 access key is set of credentials used to authenticate and authorize API requests to Amazon Web Services (AWS), specifically for access S3 (Simple Storage Service). The access key consists of two parts: (1) Access key ID, which is a unique identifier that is associated with your AWS account; and (2) Secret Access Key, which is a secret string used to sign requests and verify the authenticity of the request.
Together, these keys allow you to perform actions like uploading, downloading, and managing data in S3 buckets. For security purposes, it's important to safeguard these keys and rotate them regularly.
Do this...
1. To allow Connect and Connect Online to use the AWS S3 for attachments, click on your username, and then select My Security Credentials.

2. Click Create Access Key.
You may need to scroll down to find the section for Access keys.

Click to select the checkbox to create an access key, and then click Create Access Key.

3. Click 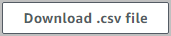 .
.
4. Save the .csv file to a secure location.
Important... Your access key will be created. It will only give you the access key once. Download and save the access key to a safe, secure location. If the access key is lost, you will need to create and save a new access key.
5. Click  .
.
Last, add your Amazon S3 access key to Connect
Add the Amazon S3 bucket access key to Connect to give Connect permission to use the Amazon S3 bucket to upload and store attachments.
Do this...
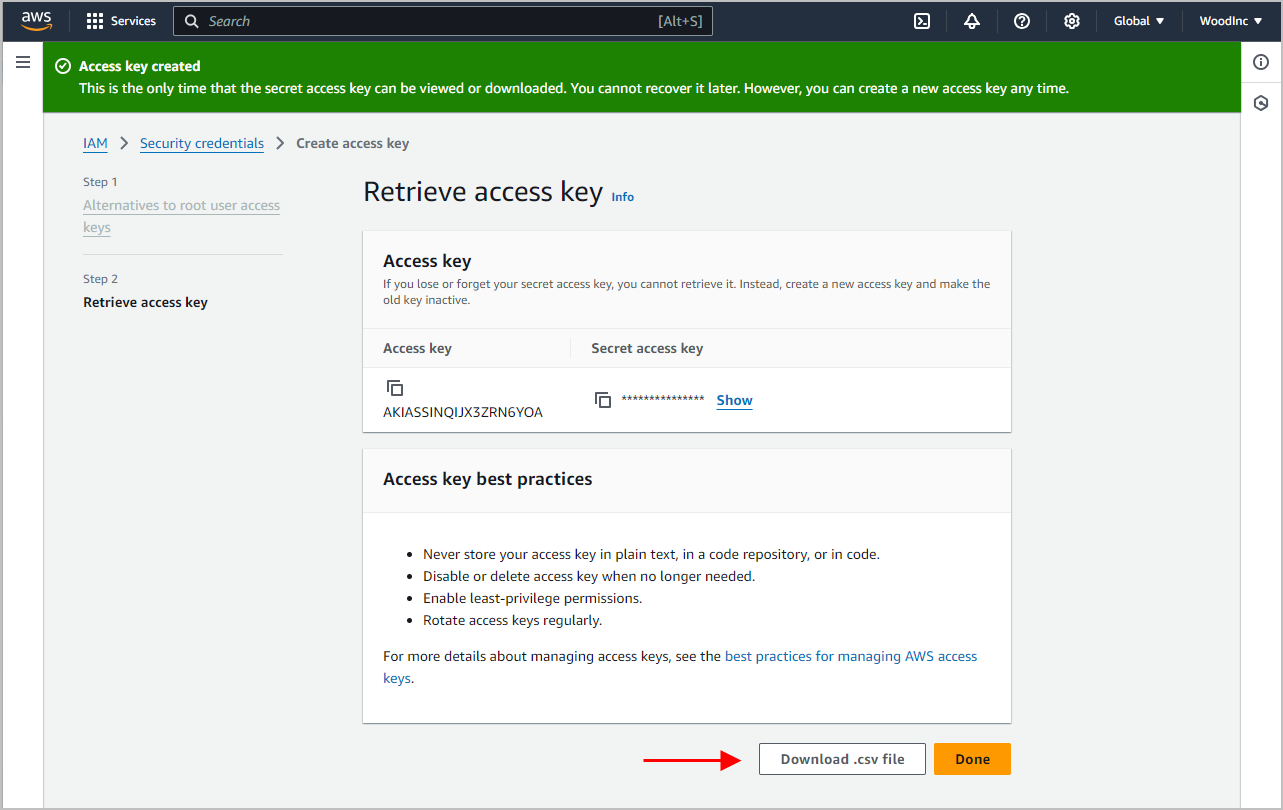
1. Open Connect System Management > Organization > Organization.
2. Click the Interfaces tab.

3. In the Online Attachment Interface section, set up the following options.
Interface
Select Amazon S3.
Access key
Enter My Access Key. This is the Access Key ID for the Amazon S3 bucket.
Secret key
Copy and paste the Amazon S3 access key for your Amazon S3 account. You can find the secret key in the .csv file that you downloaded and saved in the secure location.
Bucket
Enter the bucket name for your Amazon S3 account. Example: my-caselle-attachments-bucket
Make attachments private
Select the checkbox to hide attachments from search queries. Leaving this checkbox unselected will allow anyone to view your attachments. Note: If you have selected to block public access in AWS, you must also select the Make Attachments Private checkbox to allow users to upload attachments.
Upload new attachments
Select the checkbox to allow users to upload new attachments to AWS.
4. Click  .
.
5. Click Close.
6. Log out of Connect.
In Connect Online:
-
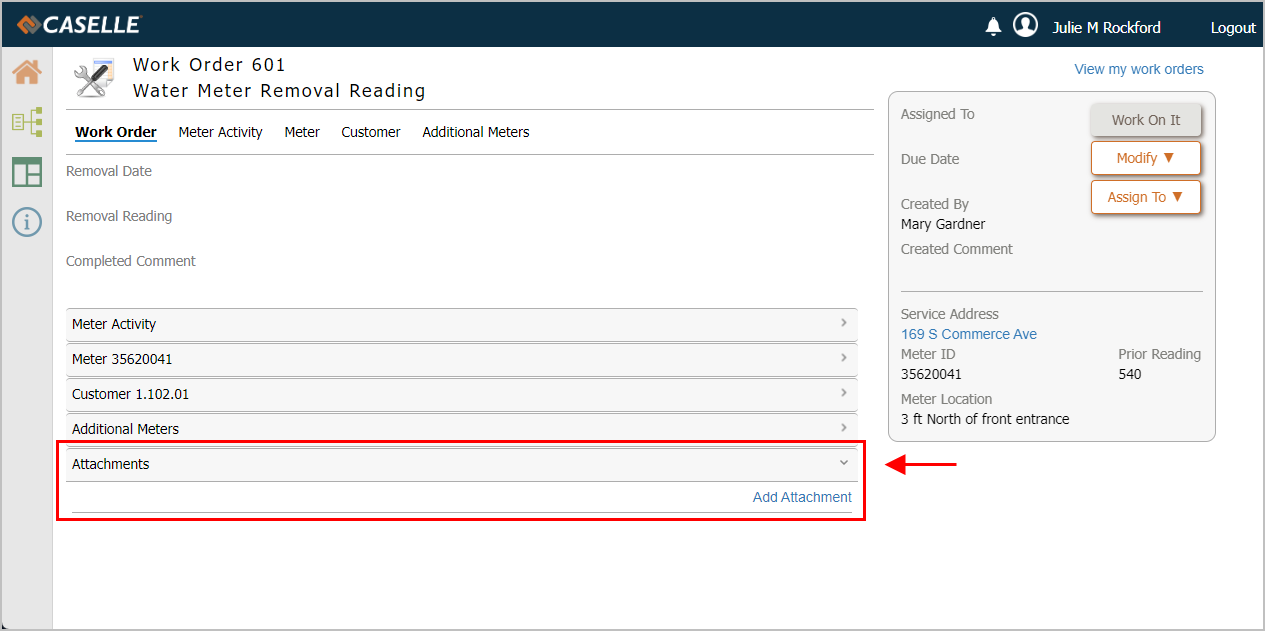
Connect Online users: Can use the Attachments section to view, add, modify, or remove an attachment. The Attachments section and Add Attachment link will only be available when the Amazon S3 interface is set up System Management > Organization.
-
Connect users: Can see the attachments that have been uploaded using Connect Online.
In Connect:
-
Connect users: Can view attachments that have been uploaded using Connect Online. Can add, modify, or edit attachments that will be uploaded to the Amazon S3 bucket and shared with Connect Online.
-
Connect Online users: Can see attachments that have been uploaded using Connect.
202408, 2024Oct24
Copyright © 2025 Caselle, Incorporated. All rights reserved.