How do I set up an Amazon S3 account? (2021.11)
Attachments
An Amazon S3 Account is a content delivery network for storing and retrieving data. You can save images and files to your S3 Cloud so you can view them in Connect and Connect Online. If you add an attachment in Connect and you're not using a content delivery network, such as Amazon S3, you'll only be able to access the attachment in Connect.
Before you get started
-
Do I need Amazon Prime to set up an Amazon S3 account? No, you can set up an Amazon S3 account without Amazon Prime.
-
Why do I need a credit card? The free Amazon S3 account provides 5 GB of free storage. If you exceed 5 GB of stored files, Amazon will bill an additional amount to the credit card. Usually, 5 GB is sufficient for most sites.
First, create an Amazon S3 account
1. Open https://aws.amazon.com/s3
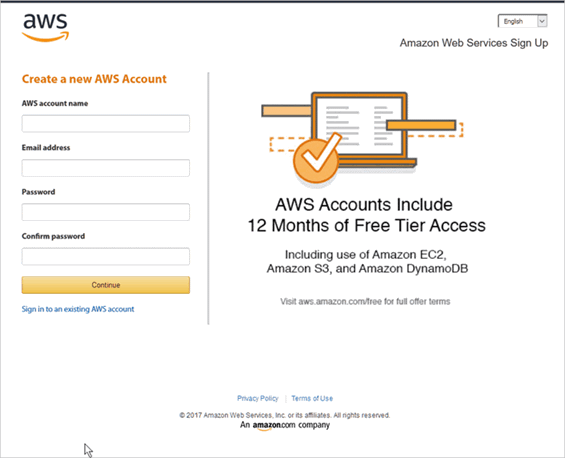
Amazon AWS sign in
2. Create a new AWS Account and then click Continue.
Now, you're ready to set up a storage bucket to hold your files and attachments.
31Oct2017
Second, set up storage options on the Amazon S3 Account
Create a storage bucket for your S3 Account. The bucket will store the attachments from Connect and Connect Online.
Do this...
1. Log in to your Amazon S3 Account.
2. Find the section titled Storage and then click S3.
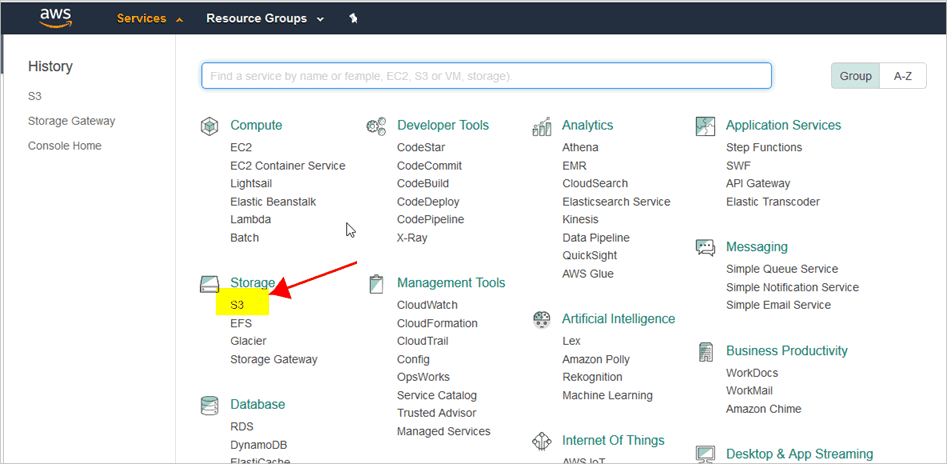
Amazon S3 Services Page
3. Click Create Bucket.
Connect and Connect Online will use the Amazon S3 bucket to store and retrieve files from the S3 Cloud.

Amazon S3 Storage Page: Create a New Bucket
4. Assign a Name and Region.
Enter a bucket name.
Use a name that's easy for you to remember.
Enter US West (Oregon) as the Region.
Important! Your organization may be located in another region however, US West (Oregon) is the region that works with the Connect Online Interface.
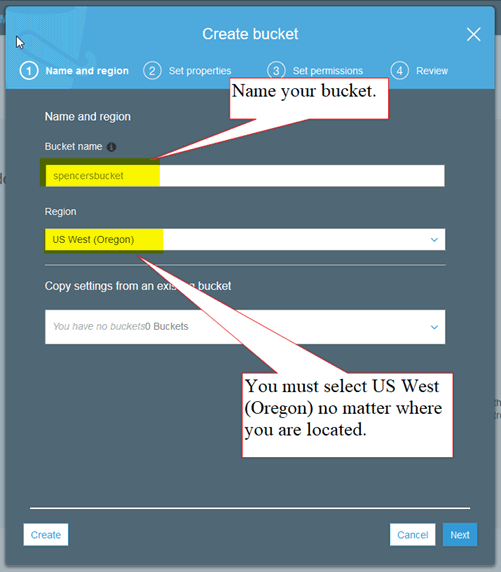
Create Bucket Dialog Box: (1) Name and Region
Click Next.
5. Do not make any changes to this screen. Click Next.
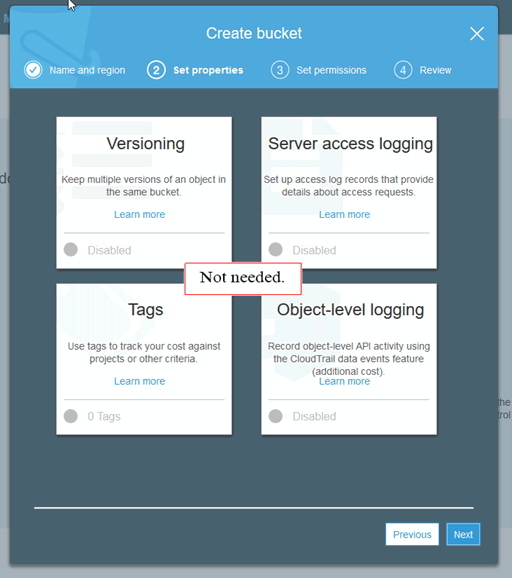
Create Bucket Dialog Box: (2) Set Properties
6. Do not make any changes to this screen. Click Next.

Create Bucket Dialog Box: (3) Set Permissions
The bucket is set up and displays on the Amazon S3 dashboard.

Amazon S3 Dashboard: My Buckets
31Oct2017
Third, set up My Security Credentials
Create a new access key and save the access key to a safe place. You'll need the access key later to set up the Connect Online interface.
Do this...
1. From the Amazon S3 dashboard, click on your user name and then use the drop-down list to select My Security Credentials.

Amazon S3 Dashboard
The Your Security Credentials Page displays.
2. Click Create New Access Key.

Amazon S3 Dashboard: Your Security Credentials
Amazon S3 creates an access key.
3. Click Download Key File.
Important! The Amazon S3 will create only one access key for each Amazon S3 Account. Please download and save the access key. If you lose the access key, you will need to create a new S3 account to save a new access key.
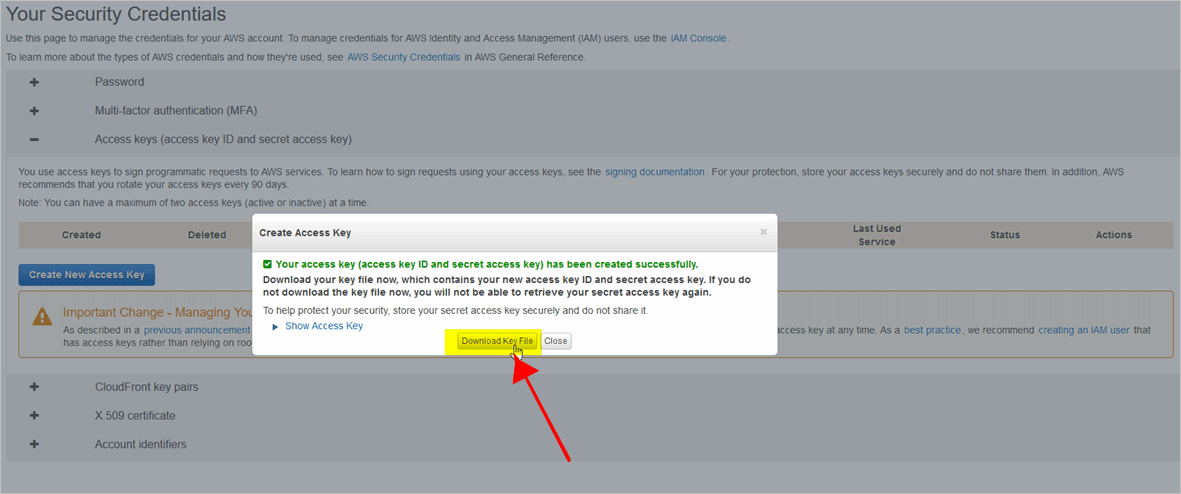
Amazon S3 Dashboard: Create Access Key
Published 31Oct2017
Fourth, set up the Amazon S3 interface in Connect
Link the Amazon S3 Account to Connect to allow users to use Connect and Connect Online to use the S3 Cloud to store and retrieve files.
Do this...
1. Open Connect System Management > Organization > Organization.
2. Click the Interfaces tab.
3. Find the section titled Online Attachments Interface.

Connect System Management > Organization > Organization: Interfaces tab
4. Select Amazon S3 as the Interface.
5. Enter the Access Key.
Copy and paste the access key that you downloaded and saved.
6. Enter the Secret Key.
The access key that you downloaded and saved will include a secret key.
7. Enter the Bucket.
This is the name of the bucket that you created on the Amazon S3 Account. Enter it exactly as it appears in your Amazon S3 Account.
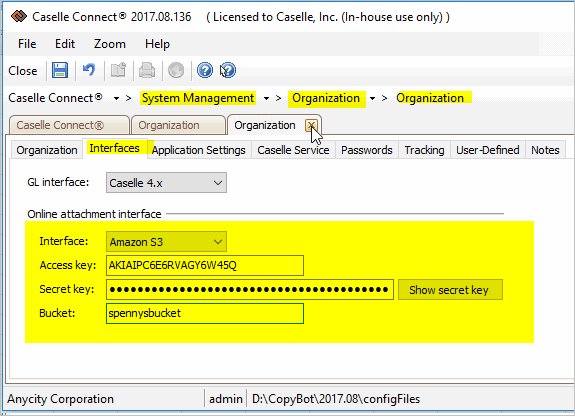
Connect System Management > Organization > Organization: Online Attachment Interface for Amazon S3 Account
8. Click Save (CTRL+S).
The Online Attachment Interface is set up to use your Amazon S3 Account.
31Oct2017
Fifth, update the Amazon S3 CORS Configuration
Replace the default CORS (Cross-Origin Resource Sharing) Configuration on your Amazon S3 Account with an updated CORS Configuration file. The new configuration file allows Connect and Connect Online to use the Amazon S3 Account to post, pull, save, and delete files.
Do this...
1. Open the Amazon S3 Dashboard and log in.
2. Open your bucket.
3. Click the Permissions tab.

Amazon S3 Dashboard: Permissions tab
4. Click CORS Configuration.

Amazon S3 Dashboard: CORS Configuration
5. Copy the text shown here.
<?xml version="1.0" encoding="UTF-8"?>
<CORSConfiguration xmlns="http://s3.amazonaws.com/doc/2006-03-01/">
<CORSRule>
<AllowedOrigin>*</AllowedOrigin>
<AllowedMethod>POST</AllowedMethod>
<AllowedMethod>GET</AllowedMethod>
<AllowedMethod>PUT</AllowedMethod>
<AllowedMethod>DELETE</AllowedMethod>
<AllowedMethod>HEAD</AllowedMethod>
<AllowedHeader>*</AllowedHeader>
</CORSRule>
</CORSConfiguration>
6. Highlight the text in the CORS Configuration field.
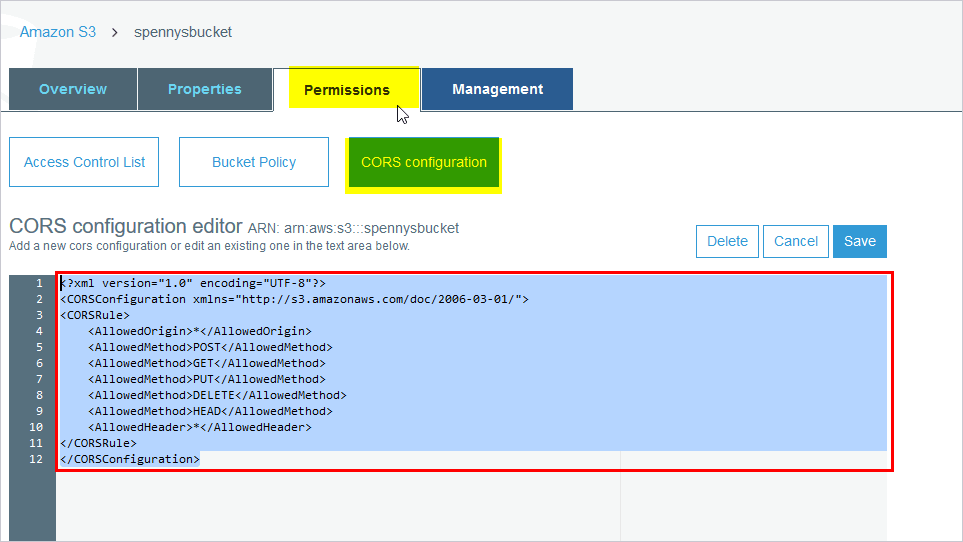
Amazon S3 Dashboard: Select the default CORS Configuration text.
7. Paste the copied text in the CORS Configuration field.
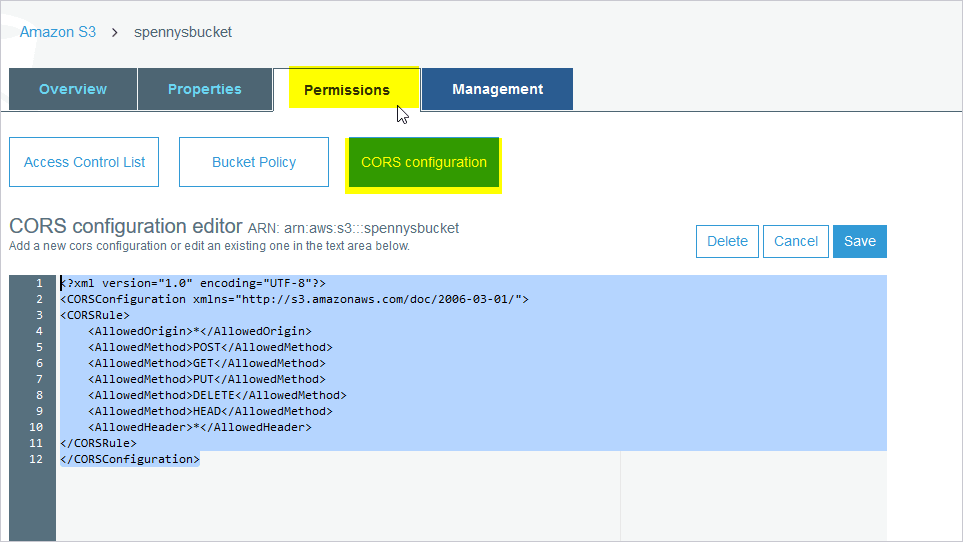
Amazon S3 Dashboard: Paste the updated CORS Configuration file.
8. Click Save.
The CORS Configuration file is updated. You can use Connect and Connect Online to read and write to this bucket in your Amazon S3 Account.
31Oct2021
Related Topics
How do I add an attachment to a work order? (Connect Online)
How do I add an attachment to an inspection? (Connect Online)
How do I upload an attachment to a Content Delivery Network? (Connect)
Copyright © 2025 Caselle, Incorporated. All rights reserved.