How do I insert an image?
Forms
A logo, border, and signature are some examples of graphics that are commonly used in Forms Design to customize the appearance of a form layout. Supported graphic types include.bmp,. ico, and . wmf.
You can insert an image to customize the appearance of a form to make it more attractive. Images in Forms Design are referenced not embedded. That means the program generating the forms must be able to access the image directory when the form prints. An X will print on the form if the program cannot retrieve the image file from the specified drive and path.
Before you get started
-
Use a graphic design program or scanner to save the graphic as a bitmap (.bmp), icon (. ico), or Windows metafile (. wmf). You can save the graphic to a disk or hard drive. Just remember where you saved them on the workstation or server.
Inserting an image
1. Click Graphic ![]() .
.
2. Place the mouse cross-hair on the workspace.
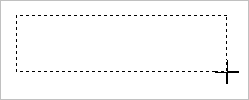
3. Click and drag the cross-hair to the approximate image size.

Drawing an image box
The Settings form displays.
4. Click the ellipsis button at the end of the Value field to browse for the image path and directory, or type in the directory and filename. Example: c:\images\image_name.gif

Settings form
5. Click Open.
The image displays on the form.
6. Click Accept.
The graphic is inserted.
Resizing the image width and height
You can make the image wider but not taller, or taller but not wider. If you wish to scale the width and height proportionally, see the topic titled Resizing Image Proportionally.
Resize the image width
Make the image wider but not taller. Click on the image to select it. Slowly, drag the mouse pointer over the right or left image border. When the mouse pointer changes to a double-headed arrow, click and drag the image border to resize.
Resize the image height
Make the image taller but not wider. Click on the image to select it. Slowly drag the mouse pointer over the top or bottom image border. When the mouse pointer changes to a double-headed arrow, click and drag the image border to resize.
Resizing image proportionally
Make the image taller and wider in proportion to the original image. Click on the image to select it. Slowly drag the mouse pointer over a corner. When the mouse pointer changes to a double-headed arrow, click and drag the image border to resize it.
Adjusting image size
1. Start by right-clicking on the image.
2. Select Settings from the popup menu.
The Settings form displays with the image width and height filled in.

Settings form
3. Enter Width in inches.
4. Enter the Height in inches.
5. Click Accept.
The image is resized.
Moving an image
There are two ways that you can move an image:
-
Position the image approximately
-
Position the image exactly
Tip: Try using Grid or Guidelines. Turn on Grid to overlay a grid on the workspace. Use Guidelines to view a crosshair at the intersection point.
Position the image approximately...
1. Click the image to select it.
2. Now, click and drag the image to move it.
Position the image exactly...
1. Click the image to select it.
2. Right-click the image and select Settings from the popup menu.
3. Enter an exact measurement in inches in Top and Left.
Top is the distance in inches from the top edge of the form. Left is the distance in inches from the left edge of the form.
Copyright © 2025 Caselle, Incorporated. All rights reserved.